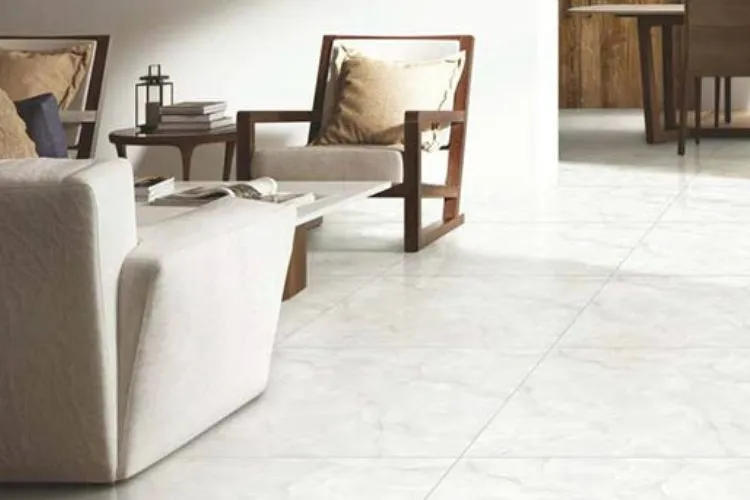
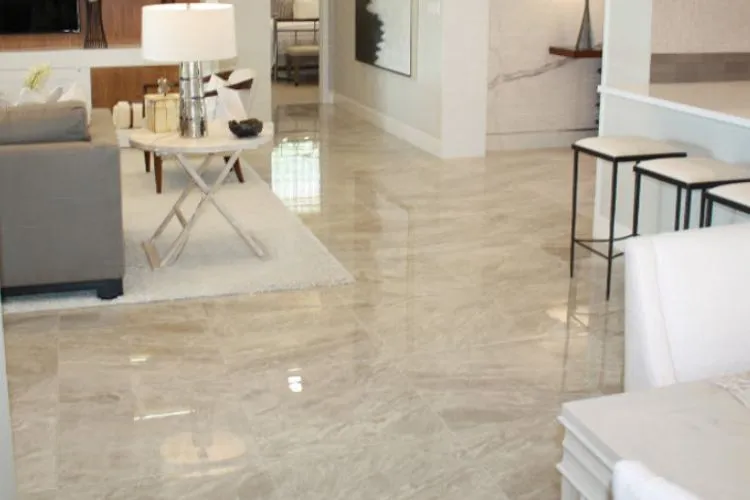
Transforming the ambiance of your home can be as simple as altering the finish of your floor tiles. Matte tiles, with their subtle elegance, offer a distinct aesthetic, but sometimes, a space demands the sleek, reflective charm of a glossy finish.
This shift can enhance light, add dimension, and inject a fresh vibe into any room.
In this article, we’ll guide you through the process of how to make matte floor tile glossy or into a shiny, polished surface, detailing the materials needed and the steps to achieve a professional-looking result.
Whether you’re a DIY enthusiast or new to home improvement, these insights will help you revitalize your floors with a lustrous gloss.
How To Make Matte Floor Tile Glossy?
Making matte floor tiles glossy can significantly change the appearance of a room, adding light and depth to your space. Here’s a detailed guide on how to achieve a glossy finish on your matte floor tiles:
Materials Needed
- pH-neutral tile cleaner
- Soft cloths or sponges
- High-gloss tile sealer
- Fine-bristle paintbrush, roller, or lint-free cloth
- Protective gloves
- Ventilation equipment (fan or open windows)
- Buffing pad or soft cloth for polishing
Preparation
- Clean the Tiles: Begin with a thorough cleaning of your matte tiles using a pH-neutral cleaner to remove all dirt, grime, and stains. Avoid acidic or alkaline cleaners as they might damage the tile surface.
- Dry the Tiles: After cleaning, allow the tiles to dry completely. This can take several hours; ensure there’s no moisture left on the surface as it can affect the application of the sealer.
- Ventilate the Area: Ensure the room is well-ventilated. Open windows or use fans to circulate air and reduce the inhalation of fumes from the sealer.
- Protect Yourself: Wear protective gloves to keep your skin safe from harsh chemicals in the tile sealer.
Application
- Apply the Sealer: Stir the high-gloss sealer thoroughly. Using a fine-bristle paintbrush, roller, or lint-free cloth, apply the sealer evenly across the tiles. Work in small sections to maintain a wet edge and avoid overlapping strokes to prevent streaking.
- Allow to Dry: Let the first coat of sealer dry completely, following the manufacturer’s recommended drying time, which is typically 1-2 hours.
- Apply Additional Coats: For a more pronounced glossy finish, apply a second (or third, if necessary) coat of sealer. Ensure each layer is dry before applying the next. Two to three coats are usually sufficient for a high-gloss finish.
- Cure the Sealer: After the final coat, allow the sealer to cure. Curing time can vary but is typically around 24 hours. Avoid walking on the floor or placing anything on the tiles during this time.
Finishing Touches
- Buff the Tiles: Once the sealer is fully cured, buff the tiles with a soft cloth or a buffing pad to enhance the shine. Circular motions can help achieve a more uniform gloss.
- Maintain the Gloss: Keep your newly glossy tiles looking their best by cleaning them regularly with a pH-neutral cleaner and soft cloth. Avoid using abrasive cleaners or tools that can scratch or dull the surface.
Tips
- Test the sealer on a small, inconspicuous area of the tile first to ensure it provides the desired finish and does not discolor the tile.
- Apply sealer carefully near grout lines; excess sealer on grout can change its color or appearance.
- Always follow the specific instructions provided by the sealer manufacturer for the best results.
By following these steps, you can transform the look of your matte floor tiles, giving them a new, glossy finish that brightens your space and adds an elegant touch to your home.
Choosing the Right Gloss Sealer for Matte Tiles
When transforming matte tiles to a glossy finish, selecting the appropriate gloss sealer is crucial. The right sealer not only enhances the tile’s appearance but also protects its surface.
Understanding the types of sealers suitable for matte tiles, the differences between water-based and solvent-based sealers, and how to select the best sealer for your tile material will ensure a successful and durable finish.
Types of Sealers Suitable for Matte Tiles
- Topical Sealers: These sealers sit on top of the tile, forming a protective layer that gives the tile a glossy finish. They are ideal for achieving a high-gloss look on matte tiles. However, they might require more frequent reapplication than penetrating sealers.
- Penetrating Sealers: While traditionally used to protect the tile rather than alter its finish, some penetrating sealers can offer a low-sheen or glossy finish depending on the product. They seep into the pores of the tile, providing protection without significantly altering the tile’s natural appearance. For matte tiles, ensure the penetrating sealer specifies enhancement or gloss properties.
- Acrylic Sealers: These are a type of topical sealer that can provide a high-gloss finish. Acrylic sealers are suitable for both interior and exterior use and are available in water-based and solvent-based formulas.
- Polyurethane Sealers: These sealers are very durable and are suitable for high-traffic areas. Polyurethane sealers can give matte tiles a glossy, protective finish and are typically available in water-based and solvent-based forms.
Differences Between Water-Based and Solvent-Based Sealers
- Composition: Water-based sealers use water as a solvent and are generally lower in volatile organic compounds (VOCs), making them more environmentally friendly and easier to clean up. Solvent-based sealers, on the other hand, contain chemical compounds that can emit strong odors and fumes, requiring more careful handling and ventilation during application.
- Drying Time: Water-based sealers usually have a longer drying time compared to solvent-based options. This can be beneficial for ensuring even application but may extend the project’s duration.
- Appearance: Solvent-based sealers tend to enhance the color of the tile more dramatically and can provide a deeper, richer finish. Water-based sealers, while still effective, may result in a lighter gloss and less color enhancement.
- Durability: Solvent-based sealers are often considered more durable and better for high-traffic areas, although advancements in water-based technology have significantly improved their performance and lifespan.
Selecting the Best Sealer for Your Tile Material
- Understand Your Tile: Different materials, such as ceramic, porcelain, natural stone, or cement, have varying porosity and chemical sensitivities. Research or consult with professionals about the best type of sealer for your specific tile material.
- Consider the Usage Area: For high-moisture areas like bathrooms and kitchens, a water-resistant sealer is crucial. Solvent-based sealers are typically more effective in these environments but check for slip-resistance properties, especially for glossy finishes.
- Health and Safety: If indoor air quality or chemical sensitivity is a concern, opt for a low-VOC, water-based sealer. Ensure adequate ventilation regardless of the sealer type you choose.
- Maintenance and Longevity: Consider how often you are willing to reapply the sealer. If you prefer a low-maintenance option, choose a durable, long-lasting sealer, even if it might be more expensive initially.
- Aesthetics: Decide on the finish you desire and select a sealer that can provide that look while still being compatible with your tile type. Test the sealer on a small, inconspicuous area to ensure it delivers the expected finish.
By considering these factors, you can select the right gloss sealer for your matte tiles, ensuring a beautiful, durable, and appropriate finish for your space.
Troubleshooting Common Issues in Sealing Matte Floor Tiles
When transforming matte floor tiles to a glossy finish, several issues may arise, such as streaks, bubbles, uneven application, discoloration, and peeling. Understanding how to address these problems will help ensure a successful and attractive finish.
Dealing with Streaks, Bubbles, and Uneven Application
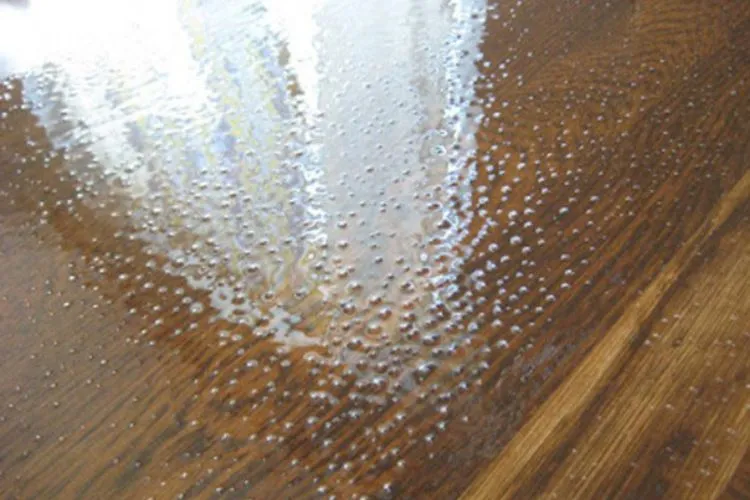
Streaks and Uneven Application
- Cause: Often result from improper application techniques, such as using too much sealer, applying uneven pressure, or working in an overly hot, cold, or humid environment.
- Solution: Ensure the tile surface is clean and completely dry before application. Use a lint-free cloth, sponge, or appropriate applicator to apply the sealer in thin, even layers. Follow the manufacturer’s guidelines for application conditions. If streaks occur, reapply a thin layer of sealer over the streaky area, blending it into the surrounding areas.
Bubbles
- Cause: Typically occur when the sealer is shaken before application or applied too thickly, trapping air beneath the surface.
- Solution: Before applying, stir the sealer gently instead of shaking to prevent air bubbles. If bubbles appear during application, gently smooth them out with a flat-edged tool or let the layer dry and lightly sand the area before reapplying a thin layer of sealer.
How to Strip and Reapply Sealer if Initial Results are Unsatisfactory?
If the sealer application is unsatisfactory, it may be necessary to strip and reapply the sealer. This process involves:
- Stripping the Sealer: Use a commercial sealer stripper suitable for your tile material, following the manufacturer’s instructions carefully. Apply the stripper, let it sit for the recommended time, then scrub the surface gently with a non-abrasive pad or brush.
- Cleaning: Once the old sealer is removed, clean the area thoroughly with a pH-neutral cleaner and allow it to dry completely.
- Reapplication: Reapply the sealer following the correct techniques and environmental conditions to avoid previous mistakes. Apply in thin, even coats, ensuring each layer is dry before applying the next.
Solutions for Sealer Discoloration or Peeling
Discoloration
- Cause: Can be caused by using an incompatible sealer for the tile material, exposure to harsh chemicals, or applying sealer on a wet surface.
- Solution: Ensure the tile is completely dry and clean before application. Use a sealer compatible with your tile material and avoid exposure to harsh chemicals. If discoloration occurs, stripping and reapplying with the correct product is necessary.
Peeling
- Cause: Usually results from applying sealer on a dirty or damp surface, or applying too many layers.
- Solution: Strip the peeling sealer, ensuring the tile is clean and dry before reapplying. Apply the sealer in thin, even layers, allowing each layer to dry thoroughly. Avoid applying more layers than recommended by the manufacturer.
Final Tips
- Always test the sealer on a small, inconspicuous area before applying it to the entire surface.
- Follow the manufacturer’s instructions for both application and environmental conditions.
- Use the right tools and techniques for application to avoid common issues like streaks and bubbles.
- Regular maintenance and proper cleaning will extend the life of the glossy finish and reduce the likelihood of issues like discoloration and peeling.
Conclusion:
In conclusion, transforming matte floor tiles into a glossy finish can rejuvenate the appearance of any space, adding brightness and depth. By selecting the right gloss sealer, preparing the surface meticulously, and applying the product correctly, homeowners can achieve a stunning, reflective finish.
However, the key to a successful transformation lies in meticulous preparation, careful application, and addressing any issues such as streaks, bubbles, or peeling promptly.
With the right approach and attention to detail, you can enhance the aesthetic appeal of your tiles and enjoy the glossy sheen for years to come.

