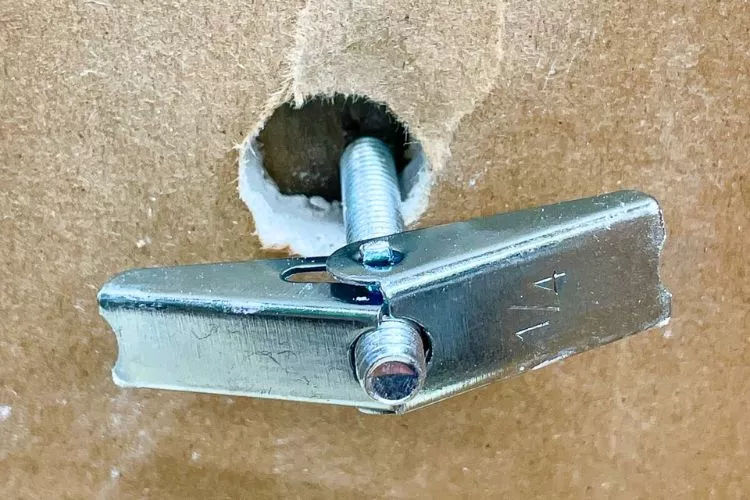
Toggle bolts are the unsung heroes of hanging heavy objects on drywall, providing extra support and stability.
But, when it comes time to remove them, many people find themselves wondering how to do it without causing damage.
In this article, we’ll give you a step-by-step guide on how to remove a toggle bolt from drywall efficiently and safely, ensuring a clean and smooth surface, ready for your next DIY project.

How to Remove a Toggle Bolt from Drywall?
Removing a toggle bolt from a drywall can seem daunting, but with the right tools and steps, it can be a simple and straightforward task.
This comprehensive guide will walk you through the process, providing safety tips and best practices along the way.
Gather the Necessary Tools
Start by assembling the right tools for the job to ensure a smooth and safe removal process.
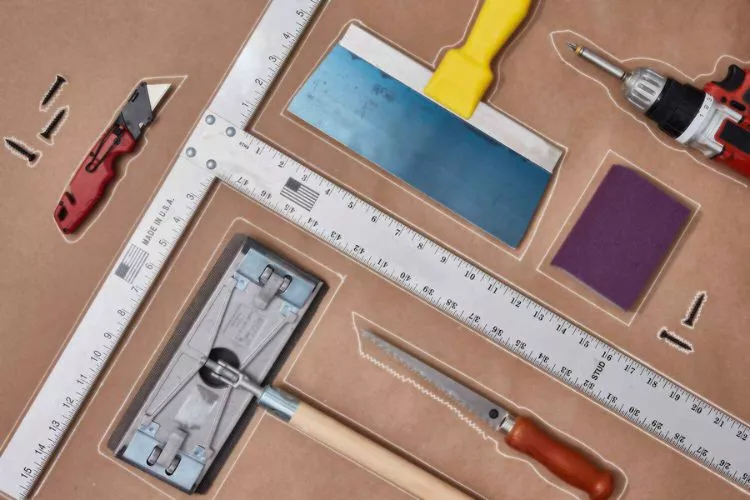
Tools required:
- Screwdriver
- Utility knife
- Spackle (compound for wall repair)
- Putty knife
- Sandpaper
Unscrew the Toggle Bolt
First off, if the item hanging on the bolt has not been removed already, do it now carefully to avoid any damage or injury.
Unscrewing the bolt:
- With your screwdriver, start unscrewing the bolt slowly.
- Be careful as you reach the end of the threads because the toggle could fall into the wall cavity once it’s no longer supported by the bolt.
Remove the Toggle
After unscrewing, the toggle (the butterfly-like metal piece) remains. If it’s small and you’re okay with leaving the toggle piece inside, then simply push it into the wall cavity.
If it’s a larger piece or if you’d rather not leave anything inside the wall, you might have to cut a larger hole to retrieve it.
Repair the Hole in the Wall
Once you’ve completed the removal, you’ll likely be left with an unseemly hole in your drywall. Here is a concise guide on how to repair that.
Repairing the wall:
- Apply spackle using a putty knife to fill the hole. Ensure the application is smooth and leveled with the wall surface.
- Let it dry as per the manufacturer’s instructions.
- Once dry, sand the area until the surface is smooth.
- Lastly, prime and paint the area to match the rest of your wall.
Congratulations! You’ve now removed a toggle bolt from drywall without causing damage. This guide will help you in all future wall-related projects, ensuring you can hang, and remove, items safely and effectively.
Tool Guide for Drywall Work
Working on drywall requires specialized tools designed to handle its unique characteristics. Here’s a list of essential tools that you will often need for drywall work and their particular uses.

- Utility Knife: A utility knife is an essential tool for anyone working with drywall. It is used to cut the drywall to size, score the surface, or remove old drywall. Make sure you have plenty of fresh blades, as drywall can dull them quickly.
- Drywall Saw: A drywall saw or jab saw is a small, handheld tool with a serrated blade. You push the pointed tip of the blade into the drywall, then saw up and down to cut. It’s useful for cutting holes needed for outlets, lights, etc.
- Drywall Screws and Drill: Drywall screws are the typical method used to secure drywall to studs. A power drill will help drive these screws into the wall easily and quickly.
- Screw Gun: A screw gun is similar to a drill but is specially designed to drive drywall screws. It has an adjustable nose-piece that sets the depth of the screw. This feature helps it from driving too far into the drywall and damaging it.
- Taping Knife: A taping knife or a joint knife is used to apply joint compound over the seams between sheets of drywall. They usually come in various widths, with wider knives used for spreading and smoothing the joint compound over a larger surface.
- Drywall Tape: Drywall tape reinforces the joints between the drywall panels. It’s embedded in a layer of joint compound over every seam and over the heads of all the fasteners.
- Mud Pan: A mud pan is a flat-bottomed tray where you can mix and hold your joint compound (also known as ‘mud’) while you work.
- Sandpaper and Sanding Sponge: Once the joint compound is dry, you’ll need sandpaper or a sanding sponge to smooth it out before painting. The sanding sponge is easier to use because it can be easier on the hand and can be dampened for wet sanding.
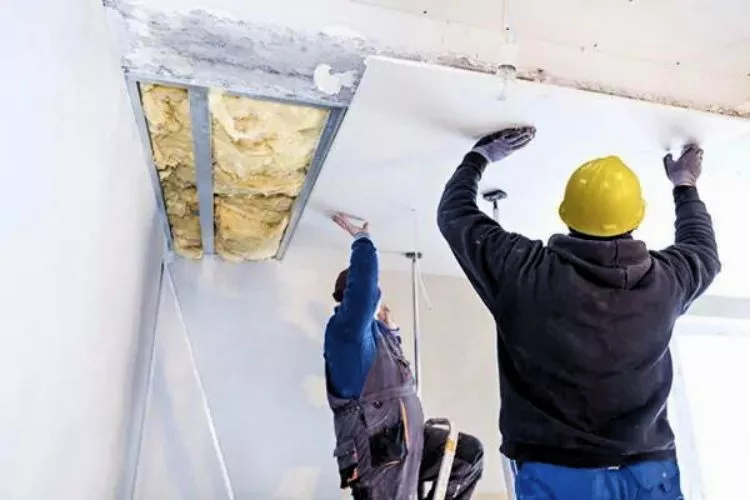
- Drywall Lift: For larger jobs where you are hanging entire sheets of drywall on a ceiling or high wall, a drywall lift can be invaluable. This device lifts, holds and allows you to easily maneuver large and heavy drywall sheets.
By knowing the function and use of these tools, you’ll be well-equipped to take on any drywall project. Always remember to handle these tools with caution to ensure a safe and efficient work environment.
Safety Tips for Working with Drywall
Working with drywall, like any home improvement task, comes with its risks. Here are some essential safety tips and precautions to keep in mind when doing drywall work.

- Protective Gear: Always wear the right protective gear. Goggles will protect your eyes from dust and debris, while work gloves will protect your hands from sharp tools and rough materials.
- Proper Lifting Techniques: Drywall sheets can be heavy, so it’s crucial to lift with your legs and not your back to prevent injuries. If a sheet of drywall is too heavy or awkward to lift safely, get help or consider using a drywall lift.
- Be Aware of Surroundings: Before cutting into drywall or drilling holes, know what’s behind it. Always double-check for electrical wires, plumbing lines, and other potential hazards before starting to work.
- Safe Tool Handling: Ensure that all of your tools are kept in good working condition and that you use them as the manufacturer intends. Never leave sharp or dangerous tools where someone could accidentally get hurt by them.
- Secure Your Work Area: Keep your work area clean and free from tripping hazards. Clean up debris and scraps as you go. This not only makes your workspace safer but makes the work easier as well.
- Proper Ventilation: Ensure that your workspace is well-ventilated, especially when sanding or applying chemicals. It’s important to protect your respiratory system and maintain a supply of fresh air to your workspace.
- Electrical Safety: If any electrical outlets or switches are involved, make sure to turn off the power at the circuit breaker before you start your work. This can help avoid the potential of a dangerous electrical shock.
Working on drywall can be a rewarding and fulfilling DIY project, but it’s essential to keep these safety measures in mind. Always take precautions to protect yourself and others to ensure a safe and successful drywall project.
Conclusion:
the process of removing a toggle bolt from drywall, while it may seem daunting, is relatively straightforward when equipped with the right tools and understanding.
Taking cautious and structured steps cannot only help remove the bolt efficiently, but also protect the integrity of your drywall.
By following the discussed procedures, you’ll find it simple to manage even larger or more complex drywall tasks in the future.
Remember, it’s always important to follow safety protocols, especially when dealing with sharp tools and heavy materials. Here’s to accomplishing successful, DIY home improvement projects


