You’ve been there – dinner dishes awaiting cleanup, and the kitchen faucet decides it’s time to test your nerves by becoming stubbornly stuck in spray mode.
It’s true that the kitchen faucet stuck on spray mode is a common yet frustrating issue, it wreaks havoc on your kitchen routine.
But fret not; this article is your beacon in the murky waters of plumbing woes.
Dive in as we demystify the reasons behind this irksome problem and arm you with effective solutions to get your faucet functioning normally again.
Embrace the journey of becoming your plumbing hero because help is in your hands.
Kitchen faucet stuck on spray mode
Are you caught in the frustrating plumbing scenario where your kitchen faucet stuck on spray mode?
You’re not alone. This article guides you through effective solutions, demystifying the process and taking you from distressed homeowner to confident DIY plumber.
Identifying the Issue
Before you pick up your toolset and jump straight into DIY mode, it’s crucial to correctly identify what’s wrong with your kitchen faucet. Here’s a more detailed approach to how you can do this:
- Stuck Head: Turn the faucet handle and inspect whether the spray head gives only a sporadic burst of water or if it’s stuck altogether, no matter which mode you choose. If the former, it may be due to a partial blockage; if the latter, the issue potentially lies with the diverter valve.
- Weak Water Flow: Turn the faucet on to its regular stream mode. Suppose the faucet releases only a trickle of water or has a diminished flow and immediately switches back to spray mode upon release. In that case, it suggests your diverter valve is stuck in the open position.
- Quick Response Test: Try rapidly changing between the modes. If it’s stuck or doesn’t respond promptly, your diverter system or the button on your spray head might be the problem.
Remember, it’s essential you confirm what exactly is wrong before attempting any fixes. Understanding your faucet’s unique tantrum allows you to tailor your approach, targeting the issue specifically, saving you both time and unnecessary effort.
Assessing the Faucet Tools
Investigate your kitchen faucet to understand what tools you might need for the fix. Usually, you’ll need:
- An adjustable wrench or pliers
- A container for holding any removed parts
- A towel for any spills
Remember, different faucet designs require different tools, so having the right ones on hand is vital.
Checking the Diverter Valve
The diverter valve is typically the main culprit in these instances. This device redirects water from the faucet tube to the spray hose. Water will always flow to the spray hose if the valve gets stuck. To check this:
- Turn Off the Water Source: Always shut off the water supply before beginning plumbing work.
- Remove the Faucet Spout: Using your wrench or pliers, gently remove the faucet spout. Be cautious not to apply too much force to prevent damaging the fixtures.
- Locate the Diverter: The Diverter is usually nestled within the spout. Check your manufacturer’s guide for the exact location.
- Examine the Diverter: Check for visible damages, blockages, or debris that could be causing the issue.
Fixing or Replacing the Diverter
After locating and checking the diverter:
- Clean the Diverter: If it is clogged with mineral deposits or debris, clean it thoroughly and replace it.
- Replace the Diverter: If cleaning doesn’t solve the problem or the diverter valve is damaged, you may need to replace it.
Testing Your Faucet
After cleaning or changing the diverter, attach it back to the spout and the spout to the faucet. Turn on the water supply and test whether the faucet can toggle between stream and spray modes.
Hiring a Professional
Sometimes, despite your best efforts, the faucet might still be stuck in spray mode. In this case, consider hiring a professional plumber. They have the necessary expertise to handle more complex plumbing issues.
Remember, while fixing minor plumbing issues yourself is rewarding, always refer to a professional if you’re unsure or if the problem persists.
While our discussion has been primarily about the issue of the kitchen faucet being stuck in spray mode, there are multiple other aspects to consider.
- This problem could be associated with a faulty diverter, a clogged screen, or an imperfect spring.
- A damaged button at the spray head, causing the faucet to be stuck in one position, could also account for failed attempts to change the spray pattern.
- Persistent spray mode can make it difficult to turn off the water, potentially damaging your home’s water.
- Impurities like hard water deposits might accumulate in the spray head control leading to these problems.
- Stuck spray nozzles can also contribute to the issue, and steps like pushing down on the handle or removing the water filter might provide some relief.
So, while the faucet getting stuck in spray mode is a common issue, it’s just one part of a larger puzzle involving several potential factors and corresponding solutions.
Kohler Kitchen Faucet Stuck on Spray Mode: Tips to Fix the Issue
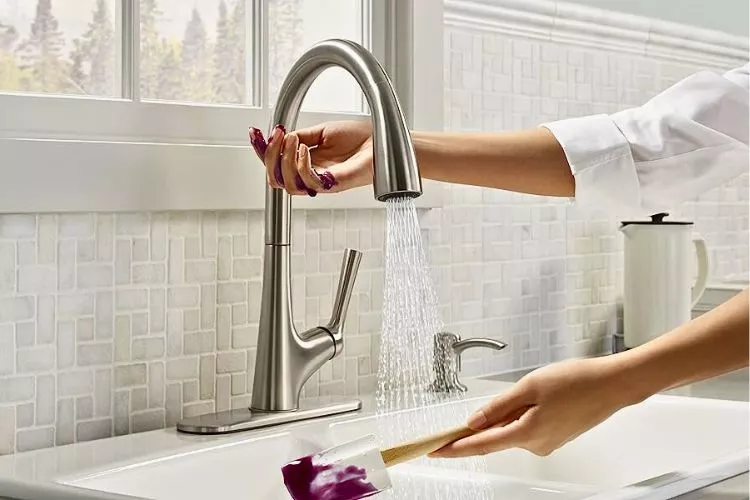
Kohler kitchen faucets, known for their durability and sleek designs, can also face the common issue of getting stuck in spray mode. Here’s how you can address this problem for Kohler faucets specifically:
Preparation
- Turn off the water supply to your faucet.
- Gather the required tools:
- Adjustable wrench
- Container for holding any removed parts
- Soft cloth, in case of spills
Check the Spray Head and Hose
Kohler faucets often come with a touch-control button for changing the spray mode. Start by examining if the button is stuck or not responsive.
- Unscrew the spray head from the hose and check for debris or blockages.
- Clean the aerator (filter screen) by soaking it in a vinegar-water solution for 15-20 minutes.
- Ensure that the hose isn’t kinked or twisted, as this might obstruct the water flow and cause the spray mode to get stuck.
Inspect the Diverter Valve
The diverter valve in Kohler faucets is critical in managing the spray mode. To examine the diverter valve:
- Remove the faucet handle(s) using an Allen wrench (if applicable, depending on your Kohler faucet model).
- Remove the bonnet connected to the faucet body (you may need to use a wrench, but be gentle to avoid damaging the fixture).
- Locate the diverter valve, usually positioned near the central post of the faucet body.
- Check the valve for any blockages, debris, or damage.
Fix or Replace the Diverter Valve
If debris is the cause, clean the diverter valve thoroughly before replacing it. If the valve appears damaged, consider replacing it with a new one. You can find Kohler-specific replacement parts from authorized dealers or online.
Reassemble and Test Your Faucet
- Reassemble the faucet (diverter, bonnet, and handle), tighten everything properly, and secure it into place.
- Reattach the spray head to the hose.
- Turn on the water supply and test the faucet to ensure the spray mode changes smoothly.
If the issue persists, contact Kohler for product support, or hire a professional plumber for further assistance.
Moen kitchen faucet stuck in spray mode
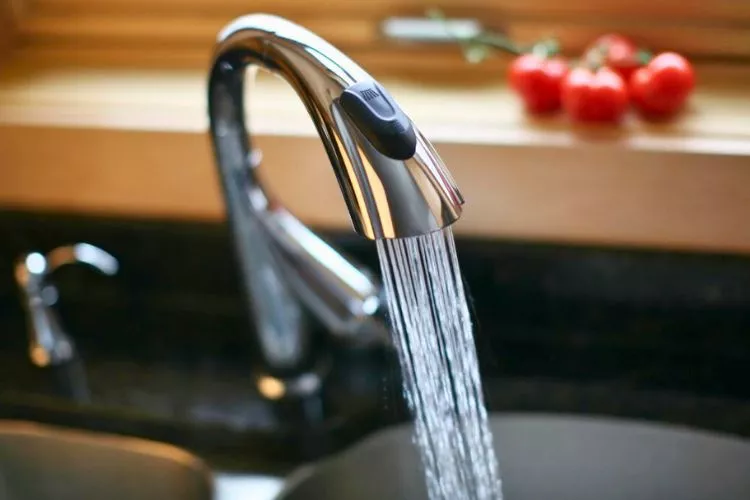
If your Moen kitchen faucet is stuck in spray mode, you may be dealing with a faulty diverter, clogged screens, or a damaged spring. By addressing these issues, you can restore your faucet’s proper function. Here’s how you can do it:
Preparation
- Turn off the water supply to your faucet.
- Assemble the required tools:
- Adjustable wrench
- Container for holding any removed parts
- Soft cloth for spills
Check the Spray Head
Moen faucets typically feature a button on the spray head to change the spray mode.
- Unscrew the spray head from the hose.
- Inspect the spray head for any debris or blockages causing the issue.
- Clean the aerator (filter screen) using a vinegar-water solution to remove hard water deposits and other build-up.
Examine the Diverter Valve
The diverter valve redirects water between the faucet and the spray head. To check the diverter valve:
- Remove the Moen faucet handle by loosening the set screw with an Allen wrench.
- Locate the diverter valve, typically found near the central post.
- Inspect the valve for any blockages, debris, or damage.
Fix or Replace the Diverter Valve
Remove any debris from the diverter valve and reassemble if cleaning is required. If the valve appears damaged, consider purchasing a replacement.
Reassemble and Test Your Faucet
- Reattach the faucet handle and secure it with the set screw.
- Reconnect the spray head to the hose.
- Turn the water supply back on and test the faucet to ensure it switches smoothly between spray modes.
Suppose these steps don’t resolve the issue. In that case, you may need a new kitchen faucet, or you may want to contact Moen directly for additional support or consult a professional plumber for further assistance.
How do you remove a spray diverter from a faucet?
To remove a spray diverter from a faucet, follow these general steps:
- Turn off the water supply to the faucet to prevent any water from coming out while you work on it.
- Remove the faucet handle. This may require using an Allen wrench to loosen and remove it.
- Remove the faucet cartridge. This step may differ depending on the faucet model. Please refer to your faucet’s manual or manufacturer’s guidelines on properly doing this.
- Remove the faucet spout. This step may also differ depending on the faucet model, so referring to the manual or guidelines is crucial.
- Locate and remove the diverter seal The diverter is typically a small rubber or plastic piece that directs water flow between the faucet and the sprayer. Gently take it out, being careful not to damage any nearby components.
- Replace the diverter seal with a new one if necessary.
- Reassemble the faucet by reversing the steps above. Replace the faucet spout, cartridge, handle, and any other parts you removed. Don’t forget to turn the water supply back on and test the faucet to ensure proper functioning.
These steps are general guidelines and may not apply to all faucet models and brands. It’s important to consult your faucet’s specific manual or manufacturer’s guidelines for more accurate information. Additionally, you can also refer to video tutorials.
Conclusion:
A kitchen faucet getting stuck in spray mode may seem like a significant problem, but it’s often fixable with the right knowledge and a few handy tools.
Whether you use a Kohler, Moen, or any other branded faucet, the main culprits are a faulty diverter valve, blocked spray heads, or kinked hoses.
You should be able to rectify the issue at home by following the steps mentioned. However, if the problem persists, never contact a professional plumber or the faucet manufacturer’s customer care for further help.
You deserve a smoothly functioning kitchen faucet that fits your day-to-day needs.


