A busy day in your kitchen and suddenly, your Delta touch faucet refuses to cooperate!
I’ve experienced this frustration of delta touch faucet not working, as have many others.
In this article, I’ll share invaluable insights I’ve gained on the common issues plaguing Delta touch faucets and how to address them.

Let’s fix this together for a smoother, seamless experience with our essential faucet.
Quick Recommendations
Last update on 2025-10-26 / Affiliate links / Images from Amazon Product Advertising API
Delta touch faucet not working! (Know the Fix)
If your Delta touch faucet is not working as expected, there can be several reasons for this, such as issues with the solenoid, the touch sensor, or even a depleted battery.
However, no need to panic! Here are detailed steps to help rectify your situation.
Check the Batteries
The typical battery life for Delta touch faucets is around 2 years. When the batteries are depleted, the touch feature will stop working completely. To fix this:
- Locate your battery pack, which should be connected to the faucet underneath your sink.
- Remove the old batteries and replace them with new ones.
Troubleshooting of the Solenoid Valve
The solenoid valve plays a crucial role in the functioning of your Delta touch faucet. By regulating the flow of water, it enables the faucet’s touch feature. When it malfunctions, you may experience inconsistencies with your faucet’s response to touch.

Checking for Visible Signs of Damage
The solenoid valve is an electronic part and any physical damage may impair its functionality. Here are steps to check for visual damage:
- Turn off the power: Always start by turning off the main power supply to avoid any electrical issues.
- Locate the solenoid valve: Underneath your sink, attached to your faucet, you’ll find a black box. This is your solenoid valve.
- Inspect it visually: Look for any visible signs of wear or breakage. Cracks, leaks, or noticeably worn parts may suggest the solenoid valve is damaged.
If any physical damage is spotted, a replacement of the valve may be necessary. This would require ordering a new part from Delta or a plumbing supply store.
Disconnecting and Reconnecting the Solenoid Valve
If no visible damage is seen, you may want to try disconnecting and reconnecting the solenoid valve. This process can often “reset” the solenoid and may resolve the issue.
- Disconnect the valve: Start by disconnecting the three color-coded wire connections on the solenoid: red, yellow, and black. You’ll also need to disconnect the wire leading from the solenoid to the battery box.
- Disengage the hoses: Next, remove the hoses connecting the solenoid valve to the faucet and the main water supply. Take careful note of which hose connects where so you can replace them correctly.
- Leave it disconnected: After everything is disconnected, leave it for about 10-15 minutes.
- Reconnect everything: Reinstall the solenoid by reconnecting the hoses and wires in their correct places. Make sure all connections are tight and secure.
After reconnecting the solenoid, test the faucet’s touch function. Hopefully, the faucet should function correctly, but if not, this might be a sign of a larger issue requiring the assistance of a professional plumber or Delta customer support.
Inspect the Touch Sensor
Sometimes, the sensor might fail to detect action due to dirt or grime. If your Delta touch faucet isn’t responding to touch, it could be due to a dirty sensor.
- Cleaning it gently with a soft cloth and mild soap might do the trick.
Reset the Faucet
In some cases, simply resetting the faucet might help.

- Disconnect it from the power source.
- Wait for approximately 30 seconds.
- Reconnect it and see if it starts functioning.
Ensuring Proper Positioning of the Mounting Nut
The mounting nut is an integral part of the faucet assembly. However, when it comes into contact with certain elements such as the sink bowl or the countertop, it can cause the touch feature to behave irregularly. Here’s how to verify and rectify this situation.
Examination Procedure
- Turn Off the Faucet: Start by ensuring that the faucet is turned off to prevent any accidental spillage during inspection.
- Spot the Mounting Nut: This nut is at the base of your faucet, just beneath the handle and above the point at which the faucet meets the sink or countertop.
- Check for Contact: Check if the mounting nut is touching the sink bowl or countertop. Your faucet should not have any metal contacts beyond its intended structure.
Adjusting the Mounting Nut
If the mounting nut is indeed in unwanted contact, you need to eliminate this to restore the faucet’s functionality:
- Loosen the Nut: You’ll need a basin wrench for this, which can reach into tight spots beneath the sink. Grip the mounting nut and gently loosen it.
- Reposition the Nut: Once it’s loosened, you can reposition the faucet slightly to ensure the mounting nut no longer contacts the sink bowl or countertop.
- Tighten the Nut: After repositioning, use the basin wrench again to tightly secure the faucet in its new position.
Ensure that the new faucet position does not compromise its usability or cause it to be unstable. If problems persist after checking and adjusting the mounting nut, it might be worth reaching out to a professional or contacting Delta customer services for further advice.
Look For Potential Water in the Solenoid Valve
Water entering the electrical components of the solenoid valve might prevent the faucet from operating correctly. To resolve this:
- Disconnect the solenoid.
- Allow it to dry out completely before reconnecting it.
Check for Wire Contacts
Loose or improperly connected wires can hinder the performance of your touch faucet. By carefully examining and fixing any loose connections, you can restore the faucet’s functionality. Follow these steps:

Locating the Wires
- Shut off the Power: Start by turning off the faucet’s power supply to avoid electrical accidents.
- Examine the Faucet Assembly: Locate your faucet’s control box, which should be connected underneath the sink. This box contains the wires connected to the solenoid valve and touch sensor.
Checking and Fixing Wire Contacts
- Inspect Wire Connections: Closely examine all the wire connections within the control box. There should be three main wires (red, yellow, and black) connecting the solenoid valve to the touch sensor along with a ground wire connecting the solenoid to the battery box.
- Ensure Proper Connection: Make sure that each wire is securely connected to its appropriate terminal. Also, check that the ground wire is properly attached to the battery box.
- Fix Loose Wires: If any wires are loose, firmly reattach them to their corresponding terminals. For those already attached, gently wiggle them to ensure they are secure.
- Disconnect and Reconnect Wires: If you are uncertain about the quality of the connections, disconnect the wires one by one. After disconnecting, carefully inspect each terminal and wire for any signs of damage, such as frayed ends. Reconnect each wire, ensuring a tight and secure connection.
Testing the Faucet
- Restore Power: Turn the faucet’s power supply back on.
- Test Touch Functionality: Tap the faucet to test if the touch feature is working correctly. If the faucet’s performance has improved, the issue with the wire contacts has likely been resolved.
If the faucet’s touch functionality remains problematic after examining and adjusting the wire contacts, it may indicate that further troubleshooting is needed or the expertise of a professional plumber is required.
Inspect the Installation for Grounding Issues
Grounding issues are quite common with touch faucets. If your faucet is improperly grounded, it could cause the touch feature to be non-responsive. To resolve potential grounding issues:
- Make sure the faucet and all of its components are correctly installed according to the manufacturer’s instructions.
- Make sure the system is properly grounded. This may require assistance from a trained professional.
If all else fails, it’s best to get professional help. Contact Delta’s customer service line for further support or consider hiring a trained plumber to inspect and troubleshoot your tap. It’s always better to be safe than sorry, especially when it comes to electrical plumbing fixtures.
Delta touch faucet not working red light
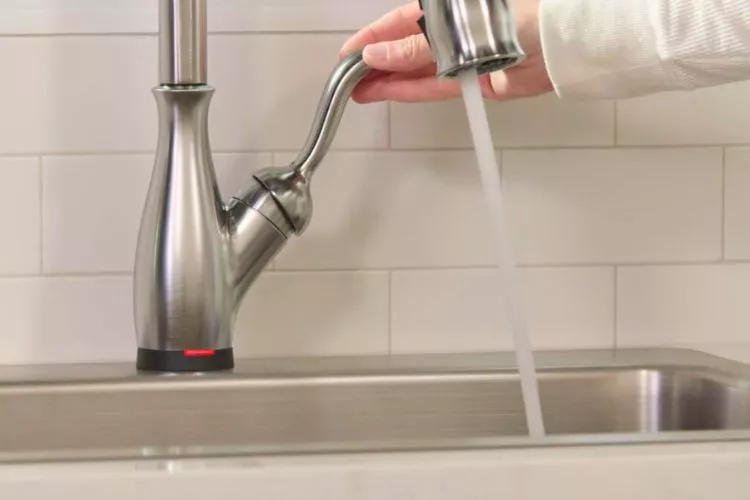
The red light on your Delta touch faucet indicates the status of the batteries. If the red light is blinking, it signifies the batteries’ power is depleting and they need replacement.

Steps to changing the batteries
- Turn off the water supply: Always ensure the water supply is turned off before proceeding to avoid any accidental spillage.
- Locate the battery box: This is typically found beneath your sink. It’s connected to the faucet’s control box.
- Open the battery box: Carefully remove the cover of the battery box. You’ll find the recessed batteries inside.
- Replace the batteries: Remove the old batteries and replace them with new ones. Make sure to follow the correct polarity when installing the new batteries.
If your Delta faucet’s red light continues to blink post battery replacement, or if it is not working at all with a steady red light, it might indicate other issues such as messy connections or a flawed solenoid.
In such scenarios, it can be helpful to refer to the full troubleshooting guides available on Delta’s website, or consult with their Tech2O Concierge Team.
In extreme cases, the solenoid may need replacement to resolve the issue. This process would require you to disconnect the battery, extract the wire from the solenoid housing, and install a new solenoid.
Given the complexity of such a task, it may be appropriate to seek out a licensed plumber or Delta’s customer service in order to avoid potential damages.
Delta touch faucet not working purple light
Delta Touch Faucets make use of an LED light to indicate the temperature of the water. Here’s what each color means:

- Blue: Cold water
- Magenta: Warm water
- Red: Hot water
While there’s no common representation for a purple light in Delta’s diagnostic indicators, if you’re seeing a purple light on your faucet, it may be an intermixing of blue and red LED signals, which could suggest an issue with the LED base unit or the wiring. This could result in faulty temperature readings.
Troubleshooting Steps
If your faucet is exhibiting an unusual purple LED behavior, you can try the following steps:
- Power cycle the faucet: Turn off the faucet’s battery box, wait for a few minutes, and then turn it back on. This can often solve minor electronic issues.
- Check the solenoid and wires: Malfunction or loose connections can cause the LED behavior to go awry. Ensure that all wires are correctly connected and none are loose.
If the problem persists, it would be advisable to reach out to Delta’s customer service for technical support. They can provide appropriate guidance based on the specifics of your faucet.
It’s also worth mentioning that if your faucet is not functioning correctly (aside from the LED indication), the issue may lie elsewhere, such as problems with the touch sensor, solenoid, battery, or mounting nut. In such cases, a comprehensive faucet check may be required.
Can a Touch Faucet Work Manually?
Yes, a touch faucet can indeed work manually. Despite the smart functionality they offer, touch faucets are designed to act also as traditional faucets. If the touch or sensor features fail or the batteries run out, they can still control water flow through the handle.
You can adjust both the water temperature and pressure in the traditional manner, providing a fail-safe utility function for those times when the smart features may not work as expected.
Delta Touch Faucet Reset Button Location
Delta Touch Faucets do not have a specific “reset” button. However, you can perform a reset by disconnecting the power from the faucet.
To do this, you have to disconnect the battery pack or power supply, which is typically located under the sink, attached to the connecting hoses.

After waiting a few seconds, reconnect the power supply, which resets the faucet. If you want to reset the LED light, you need to disconnect the wire from the solenoid and then reconnect it.
Conclusion:
Navigating through issues with your Delta touch faucet can be a challenge. However, understanding the common problems such as depleting batteries, loose wire contacts, flawed solenoids, or malfunctioning LED indicators can arm you with the knowledge necessary to troubleshoot effectively.
Always consider reaching out to Delta’s customer service if the standard fixes fail to resolve the issue. It ensures you handle the tech-heavy aspects of these faucets without causing further issues.
Ultimately, proper maintenance and timely troubleshooting can extend the life and performance of your Delta touch faucet, making your everyday tasks effortless and enjoyable.


