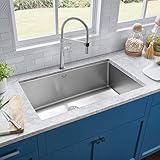
You’re standing at your kitchen sink, rinsing dishes while soaking in a spectacular view from your window. Everything seems perfect until a foul smell starts wafting up from the drain, interrupting your otherwise serene moment.
Sounds familiar, doesn’t it?
In this handy guide, I will explore the process of how to vent a kitchen sink under a window so that you can eliminate those bothersome odors and avoid problematic plumbing issues.
Ready to enjoy a fresh, clean kitchen and a great view without interruption? Let’s dive in.
Quick Recommendations
Last update on 2025-10-24 / Affiliate links / Images from Amazon Product Advertising API
How to vent a kitchen sink under a window? (A Master Guide)
Learning how to vent a kitchen sink under a window is a bit different than typical venting due to space constraints, but it’s feasible with careful planning and execution.
- Check existing ventilation: Before you begin, inspect the current ventilation system to understand your starting point and avoid unnecessary adjustments.
- Design the layout: Plan the vent layout strategically. Use a sanitary T to connect the pipe from the sink to the vent. This Tee should typically be installed less than 5 feet from the fixture outlet.
- Use U-shaped pipes or P-traps: Use a P-trap to prevent sewer gas from flowing back into the house. The U-shape holds water that forms a seal against the gases.
- Install an Air Admittance Valve (AAV): An AAV allows air to enter when drain water creates negative pressure but prevents sewer gases from escaping your home. This is particularly useful in tight spaces like under a window.
- Secure the vent: It should be run vertically or as close to vertically as possible until it ties into the house venting system.
- Seal and Insulate: Properly sealing and insulating around pipes is essential to prevent air leakage and potential water damage, particularly in a location exposed to fluctuating temperatures like a window.
Always comply with local building codes, and consider hiring a professional for the installation of complex setups.
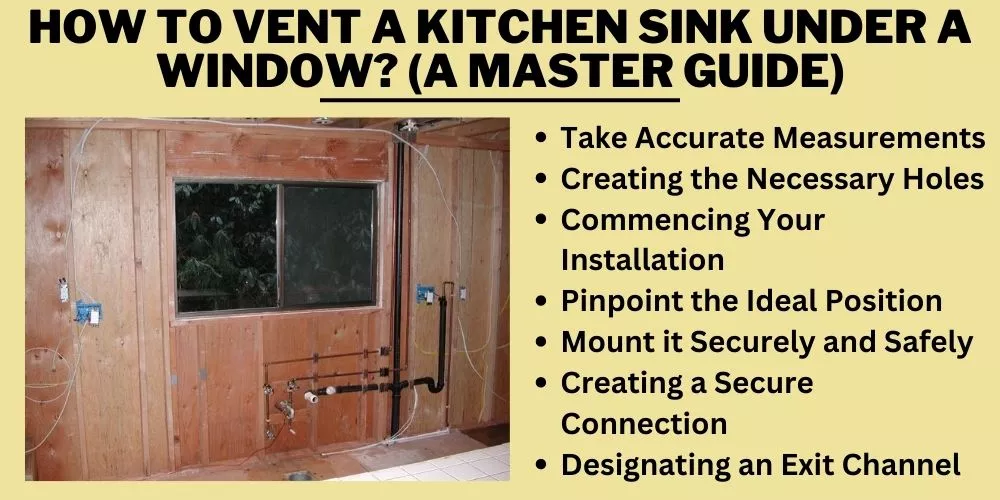
Read about the detailed guide below if you don’t have ventilation installed.
Determining Venting Distance: Take Accurate Measurements
The first step in venting a kitchen sink under a window is to measure accurately the distance for the venting. Start by taking the distance from your sink drain to where you plan to install your vent pipe.
These measurements are vital in determining the length of the pipe you would need.
Preparing for Installation: Creating the Necessary Holes
After taking accurate measurements, it’s time to make the appropriate holes in the surface where the vent pipe and P-trap will be installed. Preparation for the holes requires careful planning, as these must align with your measurements and be the right size.
- Marking the Hole Locations: Using your measurements as a guide, mark the points where you need to make holes on the wall behind your sink and the cabinet floor. The wall hole should align with the location of your vent pipe, while the cabinet floor hole should line up with the P-trap location.
- Choose the Right Drill Bit: Select a drill bit that matches the size of your vent pipe and P-trap fittings. Ensure the hole is wide enough to accommodate these components but not too large, as this may require additional sealing measures to prevent leaks.
- Drilling the Holes: Double-check your marks to ensure they’re accurate before drilling. Begin drilling the marked points, ensuring you maintain a steady hand. Drilling straight and keeping the holes clean is essential so that your vent pipe and P-trap can fit snugly and securely.
- Verifying the Hole Size and Alignment: Once the holes are drilled, double-check their size and ensure they align with your previous measurements. Place the P-trap and vent pipe against these holes to ensure they fit properly. If you discover issues in the hole size or alignment, adjust accordingly. However, remember that making significant adjustments may require patching up and re-drilling the holes.
Setting Up the P-Trap: Commencing Your Installation
The installation of the P-trap forms an integral part of the venting process. This U-shaped pipe plays several crucial roles, from trapping debris and preventing clogs to creating a water seal that blocks sewer gases from rising from the drainpipe.
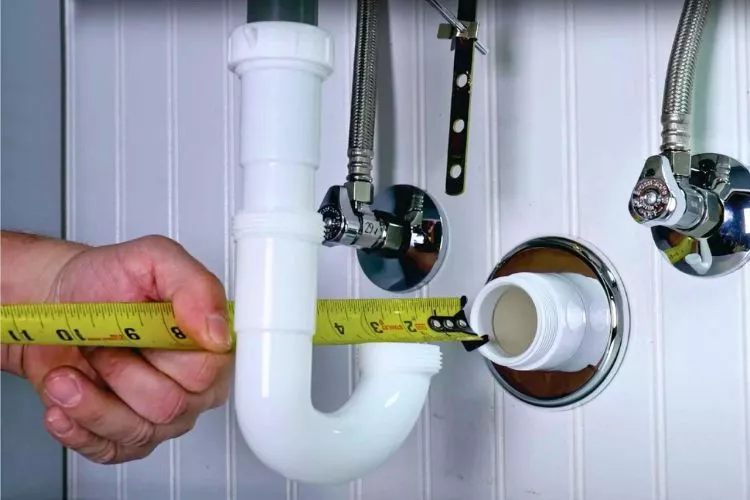
- Acquisition of Proper Material: Start by procuring a P-trap that is suitable in size for your sink. Usually, kitchen sinks require a P-trap that is 1.5 inches in diameter.
- Positioning of the P-Trap: Position the P-trap directly beneath the sink drain. This location is ideal as it allows water to drop straight into the trap.
- Connection to the Drain Tailpiece: Slide the slip nut (the part of the P-trap that allows you to attach or detach the trap) onto the sink tailpiece, followed by the washer. Insert the tailpiece into the P-trap and tighten the slip nut by hand. Ensure the connection is secure but avoid over-tightening, which could lead to potential damage.
Determining Your Vent Pipe Location: Pinpoint the Ideal Position
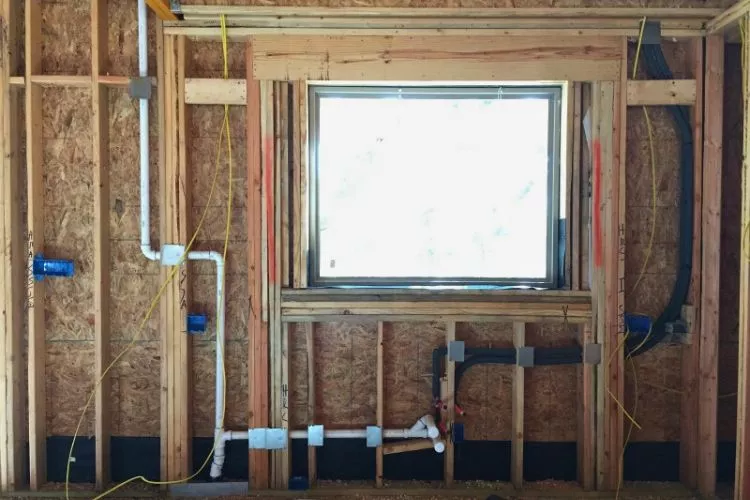
Following the P-trap installation, the focus now shifts to the vent pipe. Since your kitchen sink is under a window, the ideal vent pipe position is within the same wall hosting the window.
- Measuring and Marking the Location: Measure the distance from the P-trap to the point on the wall where the vent pipe will go. Mark this location. Ensure that it is a suitable point that does not interfere with window operation or view.
- Checking Local Building Regulations: Check your local authority’s building code requirements for vent pipe placement to maintain conformity with local codes.
Installation of the Vent Pipe: Mount it Securely and Safely
After determining the location, the next phase is the installation of the vent pipe.
- Vertical Alignment of the Vent Pipe: Install the vent pipe vertically within the wall’s cavity. Use support brackets, if necessary, to hold the vent pipe securely.
- Extension of the Vent Pipe: Ensure the vent pipe extends upwards above the sink’s flood level. This positioning is vital to prevent the possibility of water overflow from reaching the vent outlet.
- Connecting The Vent Pipe to the P-Trap: Using a sanitary tee, connect the vent pipe to the P-trap at the location within the wall you marked before. Secure the connection using a slip nut and washer for an airtight fit.
By concretizing your P-trap and vent pipe installation with these detailed steps, you’re successfully establishing a solid foundation for the remaining steps of the venting process.
Merging the Sink Drain and the Vent Pipe: Creating a Secure Connection
After installing the vent pipe and P-trap, it’s essential to establish a secure and reliable connection between the sink drain and the vent pipe. Here are the steps for doing so:
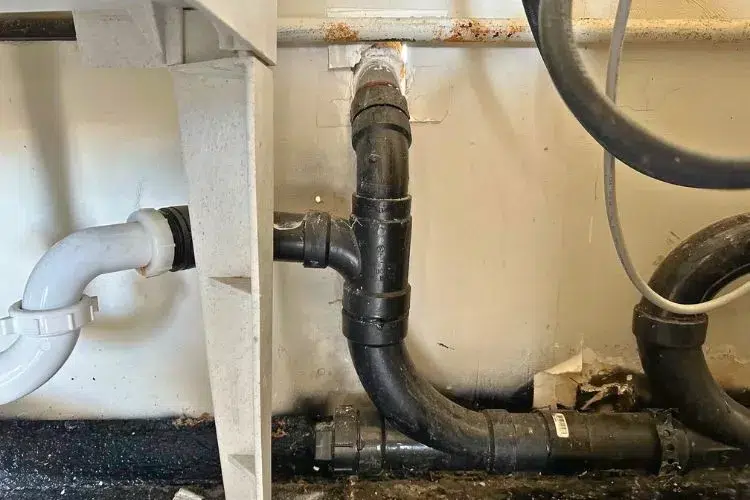
- Selection of an Appropriate Sanitary Tee: Choose the right size sanitary tee that matches the diameter of both your sink drain and vent pipe. This element is crucial for creating an airtight and secure connection.
- Determination of Proper Connection Angle: When connecting the sink drain to the vent pipe using the sanitary tee, ensure the connection angle is inclined enough, allowing wastewater to drain effectively. Ideally, this angle should be between 1/4 to 1/8 inch per foot drop (slope) for optimal drainage.
- Positioning of Sanitary Tee and P-Trap: Place the sanitary tee appropriately on the vent pipe where the P-trap arm connects. Ensure the height of the tee is such that it maintains the required slope while still preventing sewer gasses from escaping the trap.
- Securing of Sanitary Tee and Vent pipe Connection:
- Slide the slip nut and washer over the horizontal end of the sanitary tee.
- Insert the P-trap arm into the horizontal end of the sanitation tee.
- Tighten the slip nut to create a secure connection.
- Double-checking for Leaks: Once the connection is established and secure, briefly run water down the sink drain to confirm that the connections are watertight and there are no visible leaks from the P-trap, the sanitary tee, or the vent pipe connection.
Incorporating a Wall or Roof Vent: Designating an Exit Channel
The vent pipe needs a properly designated vent to expel the gases to the outside. The type of vent you choose depends on your sink’s location, your drainage system’s arrangement, and your local building regulations.
Wall Vent: Ideal for Sinks Near an Exterior Wall
If the sink is located near an exterior wall in your kitchen, opt for a wall vent. It provides a practical and efficient streamlining of the venting process, allowing the direct transfer of gases to the outside via the wall.
To install a wall vent:
- Measure and mark the location where you would like to install the vent.
- Carefully drill a hole through the exterior wall using the appropriate size hole saw or drill bit.
- Install a wall cap on the exterior side of the wall to prevent any rain or debris from entering the vent.
- Connect the vent pipe to the wall vent fitting and attach it using a coupling.
- Secure all connections using PVC cement to ensure an airtight seal.
Roof Vent: A Preferred Option When an Exterior Wall Isn’t Available
A roof vent is typically a more suitable choice when the sink isn’t close to an exterior wall. A roof vent allows gases to escape through the roof, significantly aiding in proper ventilation.
To install a roof vent:
- Measure the shortest and most direct route from the vent pipe to the roof, trying to avoid obstructions and make a mark.
- Cut a hole at the roof location using an appropriate hole saw or drill bit.
- Slide a roof flashing over the hole and secure it in place.
- Extend the vent pipe up through the roof, ensuring it’s at least six inches above the roof, according to most building codes.
- For protection against rain or debris, cap the end of the vent with a vent cap.
Remember, it’s essential to follow local building codes when deciding on a wall or roof vent, as regulations can vary widely depending on your location.
Hiring a professional is always a good idea if you’re unsure about carrying out these steps or if local regulations mandate professional installation.
What are the venting requirements for a kitchen sink?
Ventilation for your kitchen sink is important to prevent clogs and issues with drainage. According to a guide on Plumbing Navigator, your vent pipe should have a minimum pipe size of 1.5” in diameter, and you could go up to 2” in diameter.
The International Plumbing Code specifies venting methods and requirements for residential kitchen sinks. It mentions that residential kitchen sinks with a dishwasher waste connection, a food waste grinder, or both, in combination with the kitchen sink waste, shall be permitted.

A common vent concept is also described, which allows two traps to be vented by the same vent.
According to the International Plumbing Code, the fixture unit load determines the drain size for the sink. For instance, if the drain size is 4 inches (102 mm), a 2-inch (51 mm) vent is required, whereas a 3-inch (76 mm) drain would require a 1½-inch (38 mm) vent.
Another potential solution for sink venting is the installation of an Air Admittance Valve (AAV). This is fairly easy to install, whether you’re replacing an existing vent or installing one for the first time.
Please be aware that state building codes may affect the required ventilation for kitchen sinks.
Does a kitchen sink need to be vented through the roof?
Yes, a kitchen sink commonly needs to be vented through the roof. The venting system for your kitchen sink generally has vent pipes extending from the drain pipes up through the roof to provide an air passage while carrying odors out of the house.
However, the requirement can vary based on state building codes and the International Residential Code (IRC). Since 2009, the IRC has included a section regarding air replacement for houses with active kitchen ventilation.
It’s advised to check the specific regulations in your area to be sure.
If going through the roof is impractical or impossible due to the structure of the building or other reasons, an alternative, such as an Air Admittance Valve (AAV), could also be considered. But it’s important to note that not all local codes permit the use of AAVs.
Please remember that while this information provides a general guideline, you should always check with a local professional or your regional building authority to understand the specific requirements for kitchen sink venting in your area.
Where should a vent be placed in a sink?
The vent pipe placement should be carefully considered when installing a kitchen sink drainage system. As per the Plumbing Navigator, the sink’s vent pipes should guide to the main vent of your home through a horizontal pipe.
The main vent sends all materials through your home and out of the roof. It’s essential to note that the vent pipes should never point downward.
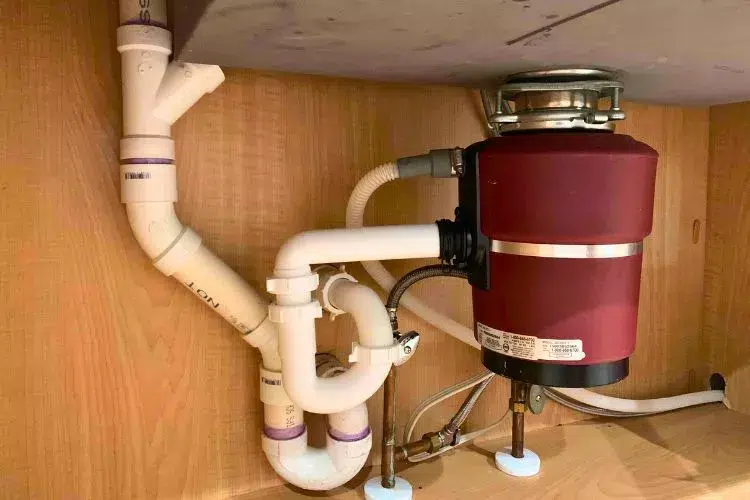
While no exact location is universally recommended, the typical approach is to have the vent pipe enter the drain pipe near the P-trap. The vent pipe creates a sort of ‘bridge’ over the drain pipe, which doesn’t interfere with the water flow but allows air to move freely in the system.
An unvented sink may have a full S-trap which may siphon and expose your home to sewer gas. Adding a vent can relieve this problem. An Air Admittance Valve (AAV) can be installed if an alternative venting method is required.
To implement this correctly, being familiar with your local plumbing and building codes is important. These codes will dictate specifications on the size and material of your pipes, among other things.
Please remember to consult with a plumbing professional or your local building authority to understand the specific requirements for vent placement in a sink in your area.
frequently asked question (FAQs)
Can you vent a kitchen sink out the wall?
Technically, you can vent a kitchen sink out the wall, but this method is not recommended for most residential plumbing systems. Traditionally, vents are run up to the attic and through the roof. Venting through the wall may be done under specific circumstances and with approval from local code authorities. Additionally, wall venting may require installing an Air Admittance Valve (AAV) to meet the proper venting requirements, but AAVs are subject to local building codes.
How far can a kitchen sink be from a vent?
According to the International Plumbing Code (IPC), pipe size determines the maximum distance a fixture, like a kitchen sink, from the vent stack. For a 1.5-inch (38 mm) drain pipe, the maximum distance from the vent is 3.5 feet (1.07 meters). For a 2-inch (51 mm) drain pipe, this limit increases to 8 feet (2.44 meters). Always consult your local codes and regulations to verify distances for your specific situation.
How far above the sink does vent need to be?
The vent pipe should connect to the sink drainpipe between 2 and 4 inches (51-102 mm) above the P-trap’s weir. This connection is where the sink pipe transitions from the horizontal to the vertical pipe. However, the vent pipe can extend further upward into the building structure. Always check local building codes to ensure you install the vent pipe at the appropriate height.
How many bends can a sink vent have?
Sink vents can have multiple bends, but the total number of bends should not create an angle greater than 360 degrees. The pipe must have an adequate slope (1/4 inch vertical drop per one foot of horizontal distance) to ensure proper drainage and prevent water from getting trapped in the vent pipes. Following local building codes and consulting a professional plumber to ensure proper venting configuration is important.
Conclusion:
Venting a kitchen sink under a window is a feasible task. Though it can be slightly complex due to space constraints, with careful planning and proper execution, this task can be accomplished.
We covered important shifts from a conventional setup, such as using a P-trap to prevent sewer gas backflow and adding an air admittance valve (AAV) to account for limited vertical space.
Remember, meticulous measurements, adherence to local building codes, and attention to sealing and insulation are paramount.
If you aren’t 100% certain of completing the project yourself, consider hiring a professional. After all, a well-vented sink is an integral part of a functional, efficient kitchen that brings comfort and safety to your home.


