A common issue many homeowners face is a toilet tank that seems to lose water, yet shows no visible signs of leakage. This perplexing situation can lead to unnecessary water wastage and subsequently, inflated utility bills.
If your toilet tank losing water but no leak, then you must understand the reasons behind this silent water loss and addressing them promptly is not only essential for maintaining a functional restroom but also for conserving water and saving money.
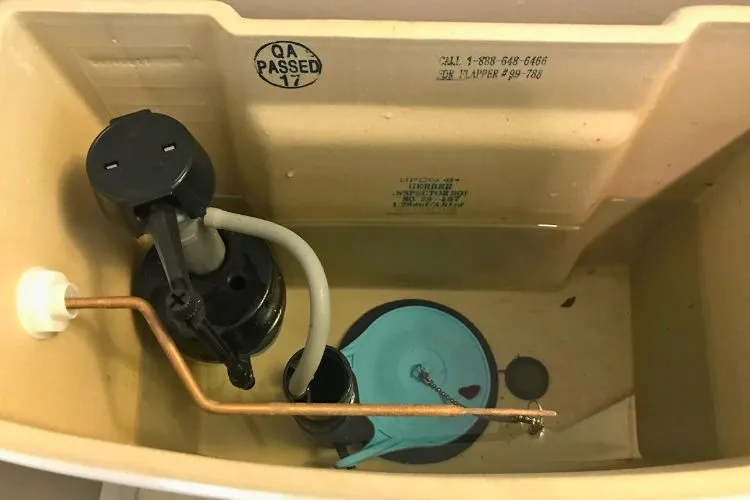
Understanding Your Toilet’s Mechanism
To effectively tackle the issue of a mysteriously emptying toilet tank, one must first understand how a typical toilet operates. The heart of the toilet’s mechanism involves the fill valve, flapper, and overflow tube.
These components work in tandem to ensure water remains in the tank until the toilet is flushed. When functioning correctly, this system maintains water levels and ensures efficient operation. However, when one element fails, it can lead to silent water losses.
Toilet Tank Losing Water But No Leak: Common Causes
When a toilet tank starts losing water without any apparent leakage, homeowners might find themselves puzzled and frustrated. However, several factors could be contributing to this invisible problem. Understanding these can help in diagnosing and fixing the issue efficiently.
Evaporative Loss
Evaporative loss is a less commonly recognized cause of water level reduction in toilet tanks. This phenomenon is more prevalent in areas with hot climates or in bathrooms that are subject to high temperatures, such as those without adequate ventilation or with underfloor heating systems.
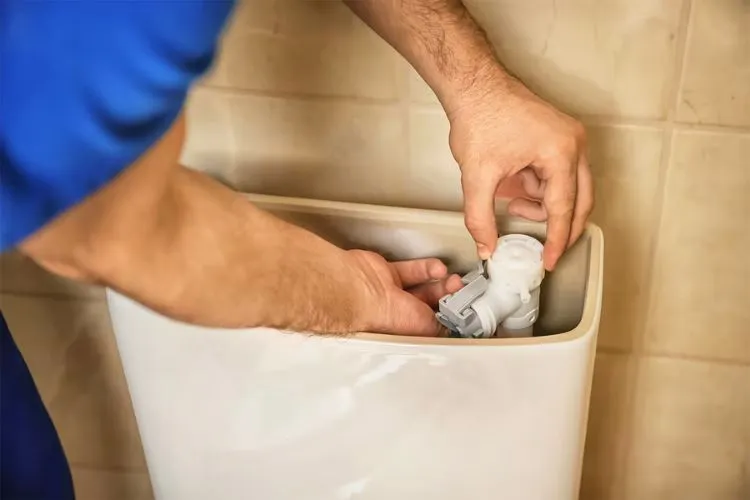
In these environments, the water inside the toilet tank can evaporate at a faster rate, leading to a noticeable decrease in the water level. While this may not result in a dramatic drop, over time, it can be significant enough to cause the toilet to auto-refill, even in the absence of a traditional leak.
To mitigate evaporative loss, consider improving the ventilation in the bathroom or reducing the room’s temperature. While it’s a less common issue, it’s worth considering if you live in a hot climate or notice the problem persisting during warmer seasons.
Malfunctioning Flapper
The flapper is a crucial component in the toilet mechanism. It serves as a seal for the flush valve, preventing water from moving from the tank to the bowl until the toilet is flushed.
Over time, flappers can deteriorate due to wear, decay, or buildup of minerals from the water. A malfunctioning or worn-out flapper can allow water to seep slowly into the bowl, a process so gradual that it often goes unnoticed by the naked eye.
If you suspect that the flapper is the cause of water loss, conducting a simple dye test can help confirm this. By adding a few drops of food coloring to the tank and waiting for 15 to 30 minutes without flushing, you can see if the dye appears in the bowl. If it does, this indicates that the flapper is not sealing properly and needs to be replaced.
Faulty Fill Valve
The fill valve controls the refill of the toilet tank and bowl after the toilet is flushed. A faulty fill valve can lead to water loss in two ways: it can allow water to continue flowing into the tank and overflow into the overflow tube, or it can fail to shut off properly, leading to a constant but slow flow of water into the tank and then into the bowl.
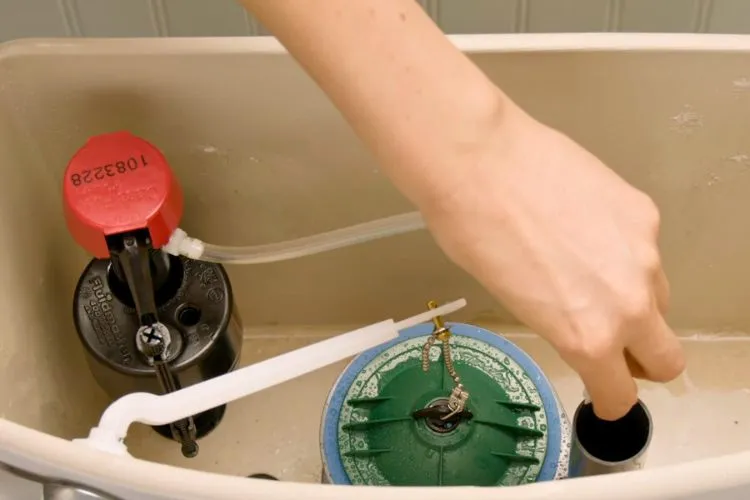
This continuous flow can be so subtle that it doesn’t create any sound or visible disturbance in the toilet bowl. Regular inspection and cleaning of the fill valve can prevent these issues. However, if the fill valve is cracked, broken, or too worn out, replacing it is the most effective solution.
Improperly Adjusted Float
The float in the toilet tank controls the water level: it rises with the water level and tells the fill valve when to shut off the water supply. If the float is set too low, the tank will not fill adequately, leading to a low water level that might be misconstrued as a leak.
Conversely, if the float is set too high, water can spill into the overflow tube and out of the tank, which might also be misinterpreted as a leak. Adjusting the float is usually a straightforward process.
For most toilets, this involves either turning a screw or sliding a clip along a rod. Proper adjustment ensures the water level stops just below the overflow tube, preventing water waste.
External Condensation
Finally, external condensation on the toilet tank can sometimes be mistaken for a leak. This typically happens when the cold water in the tank cools the tank’s exterior, causing moisture from the warm bathroom air to condense on the outside of the tank.
This condensation can drip onto the floor, creating the appearance of a leak. Addressing condensation involves improving air circulation in the bathroom, adjusting the room’s temperature, or installing a toilet tank insulation kit to prevent the outside of the tank from getting too cold.
In conclusion, while a toilet tank losing water without visible leakage can be perplexing, understanding the common causes—evaporative loss, malfunctioning flappers, faulty fill valves, improperly adjusted floats, and external condensation—can provide a clear pathway to diagnosing and solving the issue.
Regular checks and maintenance of these components can prevent silent leaks and ensure the efficient operation of your toilet.
Diagnostic Steps
To diagnose the root cause of water loss, start with a visual inspection of the toilet’s internal components. Check the flapper, fill valve, and overflow tube for any signs of wear or damage.
A dye test can be particularly revealing; by adding a few drops of food coloring to the tank water and waiting without flushing, you can see if the dye seeps into the bowl, indicating a leak.
Additionally, ensure the float is properly adjusted so that the water stops filling at the correct level, and inspect the tank and bowl for any small cracks that might be causing water loss.
Solutions and Fixes for Toilet Water Loss
Addressing water loss in a toilet tank without visible leakage involves targeted solutions for each potential cause. Here’s how to approach each issue:
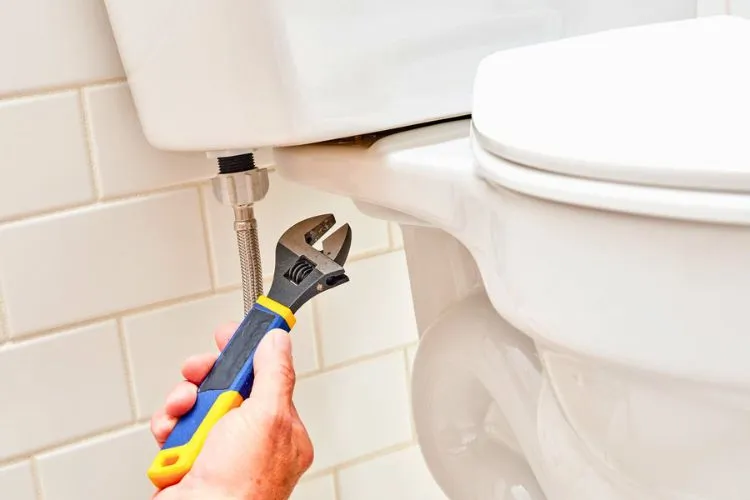
Replacing a Worn-Out Flapper
The flapper is often the culprit in silent leaks. It is a rubber component that seals the water in the tank and deteriorates over time due to wear or mineral buildup. To replace a flapper:
- Shut off the Water Supply: Turn off the water valve located near the toilet to stop the flow of water into the tank.
- Remove the Old Flapper: Drain the tank by flushing the toilet, then unhook the old flapper from its mounting arms and the chain from the flush lever.
- Clean the Valve Seat: Before installing the new flapper, clean the valve seat to ensure a tight seal. Remove any debris, mineral deposits, or algae.
- Install the New Flapper: Attach the new flapper to the mounting arms, then connect the chain to the flush lever with minimal slack. The chain should allow the flapper to seal completely when not in use.
- Adjust and Test: Turn the water supply back on, allow the tank to refill, and perform a few test flushes. Check for proper sealing and adjust the chain length as necessary.
Adjusting or Replacing the Fill Valve
If the fill valve is malfunctioning, it may cause continuous or intermittent water flow into the tank or bowl:
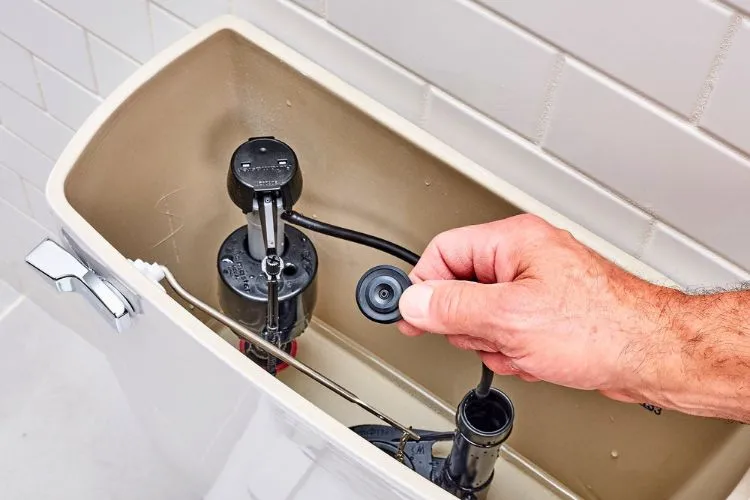
- Adjusting the Fill Valve: If the fill valve is letting water pass or not filling the tank adequately, try adjusting the water level according to the manufacturer’s instructions. This usually involves turning a screw or moving a rod that controls the float.
- Replacing the Fill Valve: Should adjustments fail to fix the problem, turn off the water supply and empty the tank. Remove the old fill valve by unscrewing the locknut holding it to the tank. Install the new fill valve, adjust the height according to your tank’s specifications, and reconnect the refill tube. Secure the new valve, turn the water back on, and adjust the water level as needed.
Correcting the Water Level with Float Adjustment
An incorrectly adjusted float can cause the water level in the tank to be too high or too low:
- Adjust the Float Mechanism: Traditional float arms can usually be bent slightly to adjust the water level. For cup-style floats, slide the float up or down along the central tube to change the water level. The correct water level is typically about one inch below the top of the overflow tube.
- Test and Retest: After adjusting, flush the toilet to allow the tank to refill and observe the new water level. Adjust again if necessary until the correct level is achieved.
Dealing with Condensation
Condensation on the toilet tank can be problematic, especially in humid environments. Solutions include:
- Improving Ventilation: Use an exhaust fan or open windows to reduce bathroom humidity levels after showers or baths.
- Using a Toilet Tank Liner: These foam or rubber liners can be installed inside the toilet tank to insulate it, preventing the exterior from becoming cold enough to cause condensation.
- Mixing Valve Installation: A more complex solution involves installing a mixing valve, which adds a little warm water to the cold water filling the tank, raising the temperature to reduce condensation.
By systematically addressing each of these potential issues, you can solve the mystery of a losing water toilet tank and ensure it operates efficiently and effectively.
Regular maintenance and prompt attention to any signs of malfunction can prevent future water loss, conserving water and saving money on utility bills.
Pro Tips
Regular maintenance is key to preventing silent leaks and other toilet issues. Periodically check your toilet’s internal components for signs of wear and replace them as necessary.
Knowing when to tackle a problem yourself and when to call in a professional plumber can save time and prevent further damage. Additionally, consider upgrading to water-efficient components to reduce the likelihood of leaks and save water.
Prevention Strategies
Preventing future water loss involves regular checks and maintenance of your toilet’s components. Investing in high-quality parts can reduce the frequency of silent leaks.
Additionally, managing your bathroom’s environment by controlling humidity and temperature can help prevent condensation-related issues, which are often mistaken for leaks.
Frequently Asked Questions (FAQs)
Why is my toilet tank water level dropping if there’s no visible leak?
The water level in your toilet tank might be dropping due to several reasons such as a malfunctioning flapper, a faulty fill valve, improper float adjustment, evaporative loss, or unnoticed hairline cracks.
How often should I check my toilet for internal leaks?
It’s advisable to inspect your toilet for potential leaks every six months. Regular maintenance can help catch issues early before they lead to significant water loss.
Can a leaky toilet increase my water bill significantly?
Yes, even small leaks in a toilet can lead to substantial water wastage over time, significantly increasing your water bill.
Are there any signs that indicate my toilet is leaking internally?
Signs of an internal toilet leak include the sound of running water when the toilet is not in use, a toilet that periodically starts to refill without being flushed, and water in the bowl changing color during a dye test.
What are the long-term effects of ignoring a silent toilet leak?
Ignoring a silent toilet leak can lead to increased water bills, potential damage to bathroom flooring and subflooring, and wasted natural resources. It’s important to address leaks as soon as they are detected to avoid these consequences.
Conclusion:
A toilet tank that loses water without visible leakage can be a frustrating issue, but understanding the potential causes and solutions can help you address the problem effectively. Regular maintenance and prompt repairs not only prevent water wastage but also contribute to the overall efficiency and longevity of your toilet.
By taking proactive steps and addressing issues as they arise, you can ensure your toilet operates effectively, conserving water and saving money in the long run.


