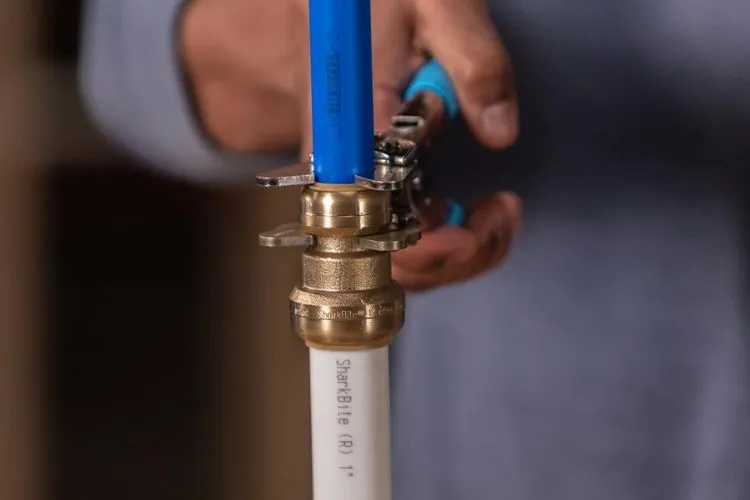
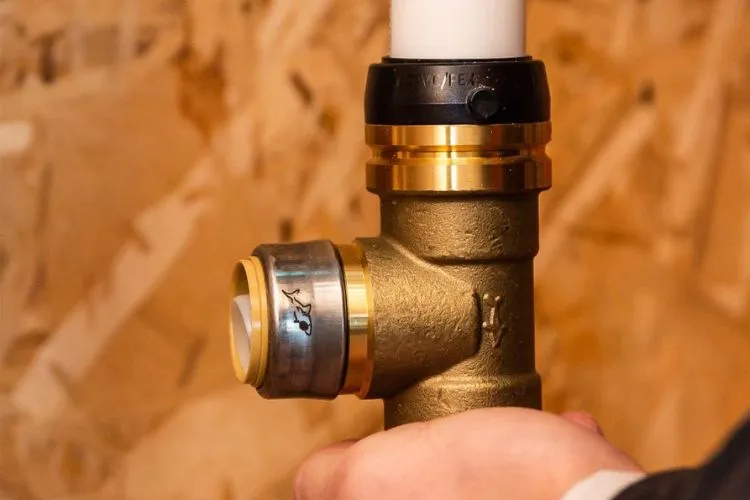
SharkBite fittings is an advanced plumbing technology, offering a quick and reliable method for connecting pipes without the need for traditional tools like soldering irons or pipe wrenches.
Understanding the mechanics and benefits of these fittings is essential for both professional plumbers and DIY home repair enthusiasts alike.
Occasionally, you may find yourself in a situation where you need to remove a SharkBite fitting, whether to replace it, change the piping layout, or perform maintenance.
Knowing how to do this correctly can save you time, money, and the potential for water damage.

How To Remove A Sharkbite Fitting: Step-By-Step Process
Before attempting to remove a SharkBite fitting, it is necessary to collect all the required tools. The proper tools ensure a smooth removal process and help prevent accidental damage to your plumbing. The essential tools include a SharkBite removal tool or disconnect clip, an adjustable wrench, and a towel or rag.
Each of these tools plays a significant role in the process: the removal tool is specifically designed to release the fitting, the adjustable wrench aids in stabilizing the pipe, and the towel is useful for wiping away any water that may escape during the process.
Turning off the Water Supply
Safety and damage prevention are paramount when working with plumbing. Before you start, locate the main water valve and turn off the water supply to the area where you will be working. This eliminates the possibility of water rushing out once you disconnect the SharkBite fitting.
After shutting off the valve, open a faucet downstream to relieve any remaining pressure and drain the water from the pipes. This step is critical—skipping it could result in water damage or injuries.
Releasing the SharkBite Fitting
With the water supply safely turned off, you can now focus on the SharkBite fitting itself. The fitting holds onto the pipe with a ring of metal teeth and an O-ring that creates a watertight seal. To release the fitting, you’ll need to use the SharkBite removal tool or disconnect clip. This tool, when used correctly, will push against the release collar of the fitting, allowing you to separate it from the pipe.
Slide the removal tool onto the pipe and up to the end of the SharkBite fitting. Apply pressure on the removal tool towards the fitting while simultaneously pulling the fitting away from the pipe with a gentle but firm motion. You might need to wiggle the fitting slightly to help it release. If the fitting is stubborn, ensure the tool is properly aligned and that you’re applying even pressure.
Removing the SharkBite Fitting
Upon releasing the collar, the fitting should come off the pipe with relative ease. Sometimes, a fitting that has been in place for a long time may require a little more effort to remove. Patience is crucial here to avoid damaging the fitting or the pipe.
If it’s challenging to pull the fitting off with your hands alone, you can wrap a towel around the fitting for a better grip or use the adjustable wrench to provide leverage, but be cautious not to apply too much force.
Checking the Pipe and Fittings for Damage
After successfully removing the SharkBite fitting, it’s essential to inspect both the fitting and the pipe for any signs of damage. If you plan to reuse the fitting, check the integrity of the O-ring and the teeth inside the fitting.
Any cracks, abrasions, or deformities could compromise the fitting when reapplied. Similarly, examine the pipe for dents, scratches, or nicks that could prevent a secure reconnection.
Pro Tips for Removing SharkBite Fittings
Here are some additional tips to help ensure the removal process is as smooth as possible:
- If the fitting is located in a tight space, consider using a specially designed SharkBite demounting tool, which is smaller and easier to maneuver.
- Always push the SharkBite fitting parallel to the pipe—pulling it at an angle might damage the pipe or fitting.
- If the pipe is plastic, be particularly gentle when removing the fitting, as plastic pipes are more susceptible to damage.
Installation Considerations for Different Environments Using SharkBite Fittings
When integrating SharkBite fittings into your plumbing projects, it’s essential to factor in the unique challenges posed by different environments. SharkBite fittings are versatile and designed to accommodate a range of temperatures and pressures, as well as both indoor and outdoor applications.

However, to ensure the longevity, reliability, and safety of your plumbing installations, here are specific considerations you should account for:
Understanding Temperature Limits:
SharkBite fittings are engineered to withstand a wide range of temperatures, but it’s vital to understand their limits. The standard operating temperature range for SharkBite fittings is between -20°F and 200°F.
Exceeding these temperatures can compromise the integrity of the O-ring seals within the fittings, leading to potential leaks or failures. For hot water systems, including heated flooring applications, ensure that the temperature settings do not surpass the fitting’s maximum threshold.
Pressure Considerations:
Similarly, SharkBite fittings are rated for various pressure levels, typically up to 200 psi, depending on the specific type and size of the fitting. When planning your installation, assess the water pressure expected within the system.
High-pressure scenarios, such as those found in commercial plumbing systems or residences with water pressure boosting systems, may necessitate verifying that your chosen fittings meet or exceed these pressures. If in doubt, consulting with a professional or referring to the manufacturer’s specifications can prevent potential issues.
Key Advice: Use pressure regulators if your water supply exceeds the recommended pressures for SharkBite fittings. Additionally, consider thermal expansion in hot water lines, which may require additional components like expansion tanks to mitigate pressure build-up.
Outdoor Considerations:
- Exposure to UV Light: While some SharkBite fittings are rated for outdoor use, prolonged exposure to UV light can degrade the plastics used in the fittings over time. If the plumbing run will be exposed to direct sunlight, it’s advisable to use UV-resistant pipe sleeves or insulation to protect both the pipes and fittings. Alternatively, consider using SharkBite fittings specifically designed with UV resistance for such environments.
- Temperature Fluctuations: Outdoor plumbing installations must endure wider temperature variations, potentially leading to the contraction and expansion of piping materials. Ensure that the SharkBite fittings used can accommodate this movement without loosening or breaking the seal. Especially in regions with freezing conditions, the choice of pipe materials paired with SharkBite fittings needs to consider resistance to freezing and potential thawing cycles.
- Corrosion Resistance: Outdoor and underground environments expose fittings to moisture, chemicals, and soils that can be corrosive. Select SharkBite fittings made from corrosion-resistant materials suited for these conditions. Brass fittings, for example, offer excellent corrosion resistance. Moreover, when installing underground, ensure that the fittings are also rated for direct burial and protected against abrasive soils.
Indoor Use:
- Accessibility and Aesthetics: Indoor installations often require considerations for aesthetics and accessibility. SharkBite fittings, with their sleek design and no soldering requirement, are suitable for visible plumbing in utility rooms or kitchens where pipes might be exposed. However, ensure that they are installed in locations where they can be easily accessed for inspection or future maintenance.
- Environmental Conditions: Even indoor environments can present challenges, such as high humidity in bathrooms or chemical exposures under kitchen sinks. In these scenarios, ensure that SharkBite fittings are not situated in locations where prolonged exposure to harsh substances or moisture levels could compromise their functionality or integrity.
General Recommendation:
Regardless of the environment, it is crucial to follow the manufacturer’s installation guidelines closely, considering the specific conditions that the fittings will be subjected to. For both indoor and outdoor applications, proper preparation of the pipe ends (cutting, deburring, and cleaning) and ensuring full insertion into the fittings are key steps that should not be overlooked to guarantee a successful and durable installation.
By accommodating the unique demands of various environments, you can harness the full potential of SharkBite fittings in providing efficient, reliable plumbing solutions that stand the test of time.
Frequently Asked Questions (FAQs)
Can SharkBite fittings be reused after removal?
Yes, SharkBite fittings are designed for easy removal and reusability. However, you should always check for any wear or damage before reusing them.
Do I need to cut the pipe before attaching a new SharkBite fitting?
If the pipe has been damaged or deformed during the removal process, you may need to cut it to ensure a smooth surface for attaching the new fitting.
How can I tell if my SharkBite fitting is secure upon reinstallation?
After reattaching a SharkBite fitting, make sure it is oriented straight and fully pushed onto the pipe. You can check the security by attempting to pull the pipe out of the fitting. If it doesn’t move, it’s secure.
Are there any differences in removing SharkBite fittings from copper, PEX, or CPVC pipes?
The removal process is essentially the same regardless of the pipe material. However, take extra care with softer materials like PEX to avoid damage when applying pressure.
Conclusion:
In conclusion, removing a SharkBite fitting can be accomplished quickly and with little fuss when done correctly. By following the outlined steps and utilizing the pro tips provided, you’ll be able to tackle this task with confidence.
Whether you’re a seasoned plumber or a DIY home improvement enthusiast, the ability to work with SharkBite fittings can be a tremendous asset to your skill set.


