Drainage issues can cause significant problems for any property, leading to water damage, soil erosion, and flooded landscapes.
Trenches for drainage, a staple in both residential and commercial landscaping, help direct water away from buildings and prevent these issues.
This article provides a comprehensive guide on how to dig a trench for drainage efficiently and ensure your property remains dry and stable.

Understanding the Basics of Drainage Trenches
A drainage trench is a narrow ditch dug in the ground, designed to channel water away from specific areas. It can be filled with materials like gravel or fitted with pipes, depending on the type of trench.
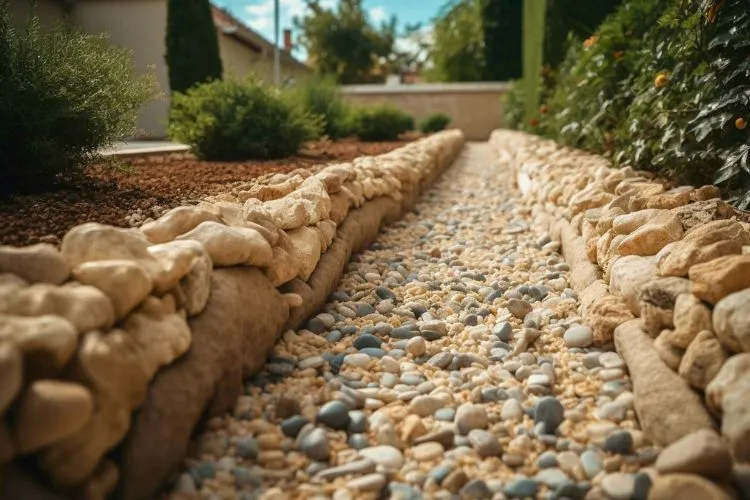
Common types include French drains which are filled with gravel, and footer drains which are usually installed at the base of a building’s foundation. Effective drainage protects your property’s structure and landscape from the negative impact of excess water.
How To Dig A Trench For Drainage?
The first step to any successful drainage project is thorough planning. Identifying key areas where water pools on your property and the landscape’s general slope will help you determine the ideal route for your trench.
Check local regulations and obtain necessary permits before you begin.
Also, call your local utilities to ensure you avoid underground lines during digging. Selecting the right type of pipe is crucial; common options are PVC or corrugated pipes, depending on your ground conditions and budget.
Tools and Materials Needed
You will need several tools to dig a trench, such as a trenching shovel, a pick mattock, and a garden hoe. Safety should never be overlooked, so wear gloves and safety glasses.
The materials you might need include specific types of drainage pipes, gravel, and landscape fabric to prevent soil from clogging the trench.

Step-by-Step Guide to Digging a Trench
Preparation
Start by clearly marking out where your trench will go, using stakes and string for straight lines or marking paint for curved areas. It’s vital to confirm there are no utility lines in your digging zone.
Digging the Trench
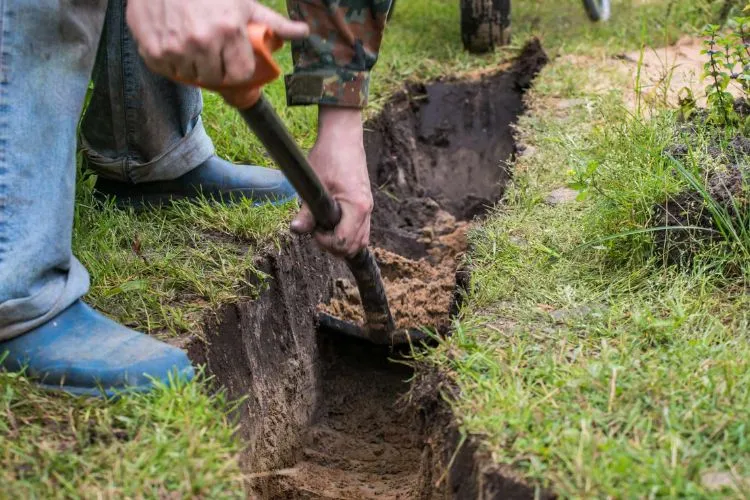
Using your tools, begin digging along the marked lines. Keep the trench’s depth and width consistent, and ensure the trench slopes slightly downwards towards the discharge point, which aids in natural water flow.
The exact slope will depend on your specific situation but maintaining a slope of about 1 percent (one inch drop per eight feet) is a good general rule.
Installing the Drainage Pipe
Lay the pipe carefully at the bottom of the trench. Ensure it lies evenly and maintains a slight slope to help water flow freely. Before covering it, test the flow by pouring water into the pipe from the highest end.
Filling the Trench
First, lay landscape fabric around the pipe to prevent soil from entering. Fill the ditch with gravel until the pipe is completely covered.
The last step is to fill the remaining space with the soil that was excavated initially. Compact the soil gently to prevent it from settling unevenly later.
Testing Your Drainage Trench
After installation, test the trench by running a substantial amount of water through it to ensure it flows correctly and exits where it should. Make any necessary adjustments to ensure the trench functions correctly under various conditions.
Maintenance and Troubleshooting
Maintain your drainage trench by checking and cleaning it regularly, especially after heavy rains or at least twice a year. Remove any debris or buildup. If water flow seems reduced or blocked, inspect the trench for misalignments or clogs.
Pro Tips for an Effective Drainage Trench
Experienced professionals recommend using a fabric liner if you choose gravel-only trenches, as it prevents soil from mixing with gravel. Also, always opt for high-quality piping to reduce the risk of collapse or damage.
Choosing the Right Location for Your Trench
Selecting the optimal location for your drainage trench is crucial for its effectiveness. Observe your property during heavy rain to identify areas where water naturally accumulates or flows.
The best location for a trench is typically along the property’s natural slope, allowing gravity to assist in water drainage. Aim to position your trench uphill from the problem area, ensuring it intercepts water before it reaches structures or pooling zones.
Avoid placing trenches too close to building foundations or property lines for optimal functionality and compliance with local codes.

Environmental Considerations
Drainage trenches, while useful for water management, can affect local ecosystems by altering natural water flow and potentially contaminating water bodies with runoff. To minimize ecological impact, design trenches to enhance existing drainage patterns without diverting water excessively.
Use permeable materials for filtration and avoid chemical-treated woods or pollutants near the trench. Incorporate vegetation buffers to slow runoff, trap sediment, and protect nearby streams and wetlands from erosion and nutrient overload.
Legal and Zoning Issues
When planning a drainage trench, it’s crucial to be aware of local zoning laws and obtain any necessary permits to ensure compliance with municipal regulations. These rules may dictate the trench’s size, depth, and location to avoid affecting neighboring properties or city infrastructure.
Contact your local zoning office to review relevant bylaws and permit processes. Secure approvals before starting work to avoid legal complications and potential fines. Compliance ensures a legally sound project and helps maintain community relations and environmental standards.
Frequently Asked Questions (FAQs)
How deep should a drainage trench be?
Depth can vary based on your drainage needs and soil type, but generally, 18 to 24 inches is sufficient for most residential projects.
Can I install a drainage trench myself, or should I hire professionals?
While it’s possible to DIY, complex landscapes or large-scale projects might benefit from professional input.
What is the best type of drainage pipe for a residential property?
PVC pipes are durable and cost-effective, making them a popular choice among homeowners.
How often should I check and maintain my drainage trench?
Inspect and clean at least twice a year and after any severe weather.
What are the common signs that my drainage trench isn’t working properly?
If you notice pooling water or soil erosion near the trench, it might be clogged or require adjustments.
Conclusion:
Digging a drainage trench can seem daunting but following these steps will help you install a functional drainage system and protect your property from water damage.
With careful planning and execution, this project is completely achievable for anyone willing to put in the work.


