Hey there! Do you live in a small apartment and need extra space? Or maybe you just want to create a more private area in your home.
If so, you’re in luck! In this article, I will help you learn how to build a temporary wall in an apartment.
I’ll use some simple materials you can find at your local hardware store. And the best part is this project is relatively easy to do, even if you’re not the most handy person.
In this article, I will cover the following topics:
- What materials will you need
- The steps involved in building the wall
- Some tips and tricks
So, whether you’re a first-time DIYer or a seasoned pro, you will find this helpful.
Quick Recommendations
Last update on 2025-08-01 / Affiliate links / Images from Amazon Product Advertising API
How to build a temporary wall in an apartment?
Are you looking to divide a big room into two or seeking privacy in a shared space? Building a temporary wall may be your solution.
This do-it-yourself guide is comprehensive, detailing all the materials needed, the steps involved, and some tips and tricks to build your temporary wall.
Materials Needed:
- Two sheets of plywood (4×8)
- Four 2x4s (10 feet, kiln-dried)
- Drywall screws
- Cordless drill
- Level
- Tape Measure
- Circular saw
- Stud finder
- Pencil
Before you gather your materials, remember to measure your space accurately. This will help you figure out how much plywood and 2x4s you need.
Steps Involved in Building the Wall
- Prepare Your Room: Clear the area where you will place the temporary wall.
- Measurement: Measure the height, length, and width of the space where you want to install your wall. Mark the points where the wall will meet the existing walls, ceiling, and floor using your pencil.
- Cut the 2x4s: Cut your 2x4s to create a frame using your measurements. You need two pieces for height and three for width (a top, middle and bottom support).
- Create Your Frame: Screw together the cut 2x4s to form your frame. The two vertical pieces should be on the ends, with the horizontal pieces in between.
- Install the Frame: With the help of a level and stud finder, screw the frame in place and ensure it’s secure and even.
- Measure Plywood: Measure your plywood according to the frame’s size and cut two pieces accordingly.
- Attach Plywood to the Frame: Attach the plywood cutouts on both sides using drywall screws.
Tips and Tricks
- Do not screw the temporary wall to your apartment’s walls if they have been painted or wallpapered recently.
- Try to balance the need for sturdiness with being mindful of minimal damage to the apartment structure.
- Take your time during measurement, as wrong measurements can lead to wastage of materials or a poorly constructed wall.
- If you plan to hang heavy items on the wall, mount brackets on the wall studs.
- Always follow safety guidelines while using power tools.
- Remember, this wall is temporary; therefore, do not load too much weight onto it.
This tutorial should help you build that temporary wall you need. Happy building!
How much does it cost to build a temporary wall?
The cost of building a temporary wall can vary greatly depending on the materials used, the size and height of the wall, your geographic location, whether you hire a professional, and the wall’s overall design. Below are the key points to consider:
Materials
The bulk of your cost will be from materials, including:
- Plywood usually costs around $20 to $40 per sheet (4×8 ft).
- 2x4s (wooden beams): These can run about $3 to $6 per piece; you’ll generally need at least four.
- Drywall screws: A box could be around $5 to $10.
- Other supplies include a cordless drill, circular saw, level, stud finder, and tape measure. These tools range from $10 to several hundred dollars, but you likely already have them or can borrow them.
Size of Wall
The bigger the wall, the more costly due to the extra materials required. For example, a wall that reaches the ceiling of a room will need more 2x4s and plywood than a half wall used as a room divider.
DIY vs. Hiring a Professional
Doing it yourself is more cost-effective, but it needs time, skills, and tools. Hiring a professional contractor ensures a higher quality of work and saves time and effort, but it can cost between $1000 and $3000, depending on the complexity of the project and local rates.
Additional Features
You might also want to consider costs for features like doors, windows, or specialized coatings. For example, a simple door can add another $100 to $500 to your budget.
On average, if you decide to do it yourself with all the required tools and materials, a single temporary wall project might cost around $200 to $600, depending on the wall size. However, if you hire a professional, expect a starting cost between $1000 and $3000.
Remember, these are just estimates. Doing your research to estimate the most accurate cost for your project is crucial. Always ask for several quotes if hiring a professional, and shop around to guarantee you get the most out of your budget.
Types of Temporary Wall
Temporary walls are a cost-effective and efficient way to maximize space or create privacy. They are popular in urban areas where living spaces must be adapted to accommodate changing needs.
This guide will explore three main types of temporary walls – Pressurized Walls, Partition Walls, and Bookshelf Walls.
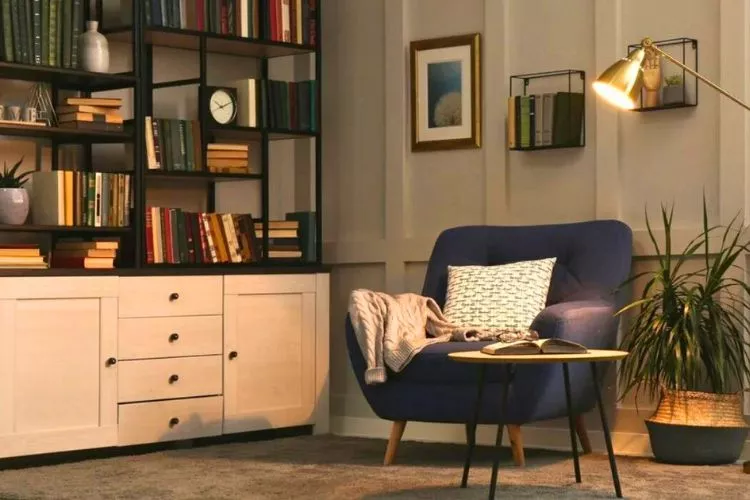
Pressurized Walls: An Ingenious Solution
Pressurized walls are one of the most common types of temporary walls used to divide living spaces. They are called “pressurized” because they stay in place using pressure exerted between the floor and the ceiling, leading to a significantly sturdy and reliable wall.
Pressurized walls don’t require any nails or screws to be drilled into existing walls, making them ideal for rental spaces. The walls can be easily taken down without damaging existing structures.
Many also come with options for built-in doors, closets, or windows, allowing a high degree of customization based on your requirements.
Partition Walls: The Classic Room Divider
Partition walls provide a straightforward solution to dividing or compartmentalizing a room into separate spaces.
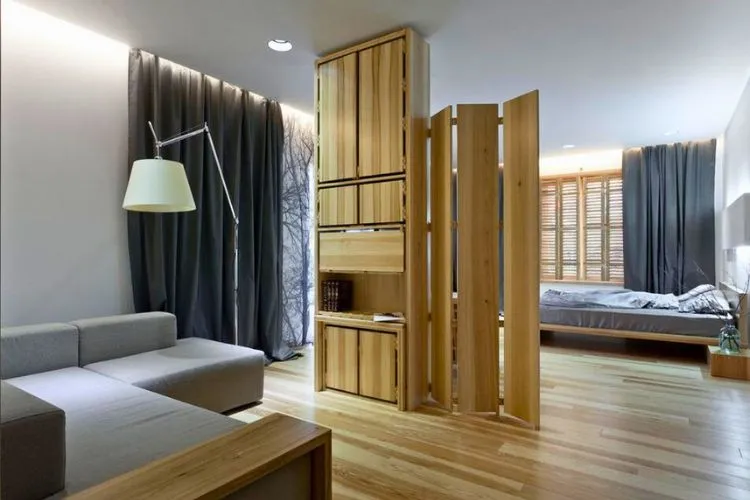
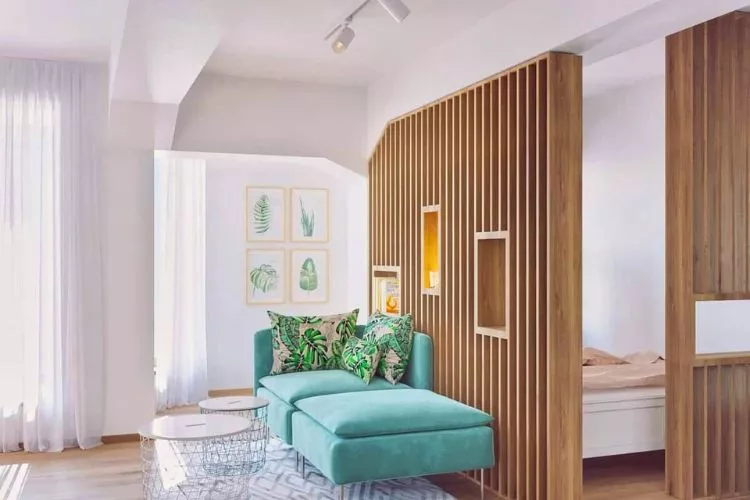
These walls are usually lighter and easier to install compared to pressurized walls. Ideal for offices, living rooms, or larger bedrooms, partition walls come in various materials, including wooden panels, glass, or even fabric screens.
They are also quite versatile; some options offer soundproofing or even fire resistance, making them a suitable choice for various situations where enhanced safety or privacy is needed.
Bookshelf Walls: Dual-Purpose Solution
Bookshelf walls serve a dual purpose – they act as functional storage spaces while dividing a room. These walls provide a stylish, clever design solution that integrates form and function. They can be floor-to-ceiling or shorter, creating an open and airy feel.
Bookshelf walls can be customized to fit your decor style, with options from classic wooden shelves to modern, minimalist metal structures. They are a resourceful way to optimize space, especially in small apartments, and add an appealing aesthetic touch to the room.
Choosing the right type of temporary wall depends on your needs, the space available, and your style. Each type offers unique advantages, so consider your options carefully before deciding.
How to build a temporary wall in a rental?
Creating privacy or defining new areas within your unit can be challenging in rental spaces. A temporary wall can be the perfect solution. Here is a detailed guide on how to build a temporary wall in a rental.
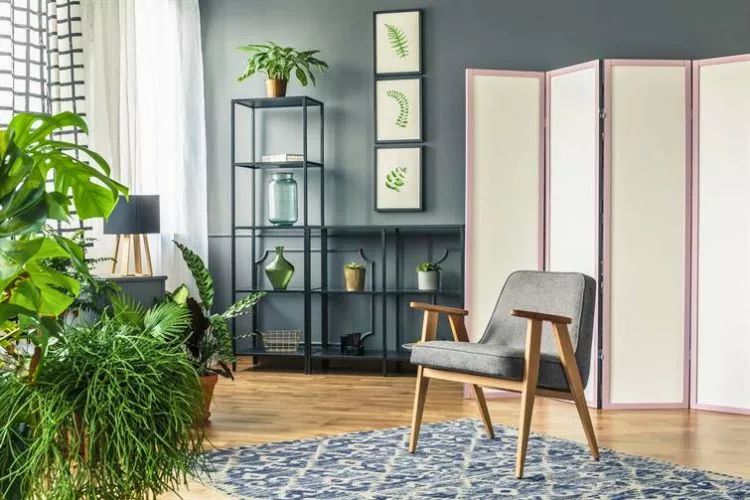
Check the Lease Agreement and Contact Your Landlord
Before starting the project, carefully read your lease agreement. Many contracts have specific clauses about changes you can and cannot make within your unit. If unsure, contact your landlord or property manager directly to discuss your plans.
Many rentals don’t allow permanent alterations, but temporary walls are usually acceptable because they don’t cause structural damage when installed or removed correctly.
Plan and Measure
Plan the layout of your new wall carefully. Ensure that the wall construction won’t obstruct exit access for safety reasons. Once you’ve decided on the placement, measure the height and width of the space correctly.
Getting accurate measurements is crucial because they will dictate the amount of material required.
Gather Materials
Usually, you’ll need:
- Plywood or drywall
- Wooden studs
- Screws
- Tools like a drill, circular saw, level, stud finder, and tape measure
Remember that your wall’s width, height, and intended use will dictate how many and what type of materials you’ll need.
Build the Frame
Create the wall frame using wooden studs. Start by constructing a rectangular structure comprising two vertical and two horizontal pieces. Ensure that this frame fits perfectly the height and width of your planned area. The level tool can assist you in aligning the framework correctly.
Attach the Cover
Once your frame is securely placed, attach the plywood or drywall to it. Ensure all edges are flush with the frame, then secure the cover using screws.
Install the Wall
Now, place your constructed wall in the desired area. If necessary, use shims to help the frame fit more securely. It’s vital to ensure your wall is level and straight.
Decorate
Once the wall is secure and even, you can decorate it as you see fit.
Tips:
- Avoid nailing or gluing the wall to the floor or ceiling, as it may cause damage.
- Always remember safety first when using power tools.
- Temporarily fitting the wall to the frame before securing it can help avoid mistakes.
- Consider professional installation if you want a more complex design, such as a wall with a door or windows.
How can I partition a room cheaply?
If you’re on a budget and looking to redefine your space, there are plenty of ways to partition a room without breaking the bank. Here are step-by-step instructions and tips for creating practical, inexpensive room partitions.
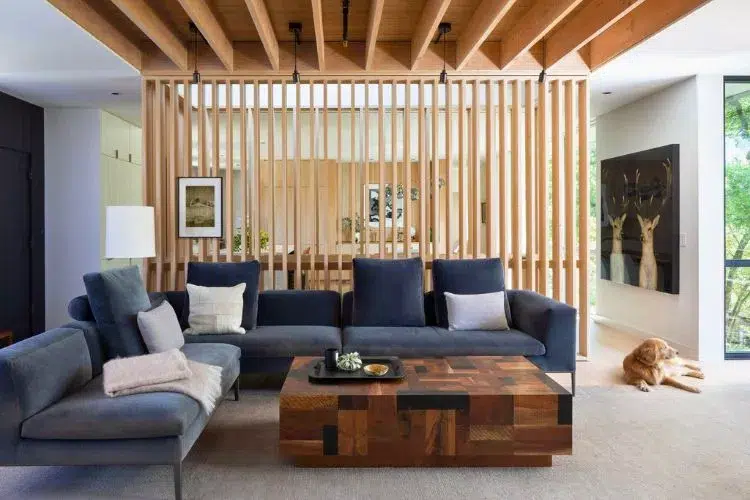
Evaluate Your Space
First, evaluate your space and determine exactly what you want from the partition. Is it for privacy, to create a separate nook, or to organize your office area? Knowing the purpose can guide your decision on the type of partition you choose.
Choose a Suitable Partitioning Method
Several methods can be used for partitioning a room cheaply:
- Curtains or Drapes: Easy to install, curtains or drapes can create a soft division between spaces. Measure your space to ensure you buy the right curtain length.
- Folding Screens: These are portable and flexible solutions. They come in various styles, sizes, and materials to fit your decor.
- Bookcases or Shelving Units: Using furniture as a room divider can provide extra storage while creating distinct areas in a room.
- Plants: Tall plants can create a natural, aesthetically pleasing partition. Choose plants that fit your lighting conditions and lifestyle.
- Recycled Wooden Pallets: With creativity, wooden pallets can serve as a unique, cost-effective room divider. Add some paint or growing vines for a more dynamic look.
Implement Your Idea
Now that you’ve chosen your partition method:
- Curtains: Install curtain rod or wire (using hooks if needed) and hang your chosen curtains.
- Folding Screens: Simply purchase the screen and place it where needed.
- Bookcases: Arrange your bookcase or shelf in the room as a divider. Remember to balance the materials on the shelves for stability.
- Plants: Choose tall, full plants and arrange them to create a green wall.
- Wooden Pallets: Some pallets might require sanding or painting. Then, just arrange them to form your new wall.
Decorate Your Newly Partitioned Room
Blend your new room partition into your existing décor to ensure a harmonious look. Color, texture, and furnishings all contribute to the overall effect.
Tips:
- Always measure your space first.
- For an inexpensive option, consider second-hand items.
- Choose a partition method that complements your existing décor.
- Safety is crucial. Make sure your partition is safe and won’t tip over.
How do you close an open room without building a wall?
Open room concepts are great for many reasons, but there may come a time when you want to achieve a sense of privacy or separation without building a permanent wall. This guide will help you learn how to close an open room in various creative ways.
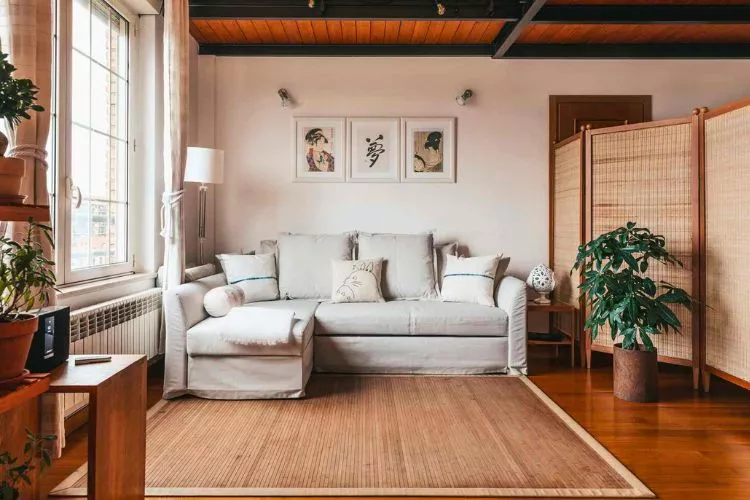
Evaluate Your Space and Decide on a Purpose
Before you choose a solution, assess your space and understand what you want to accomplish. Are you seeking privacy? Create a workspace or separate living areas? The purpose will guide the choice for your room closure.
Consider Your Options
Now that you have a clear purpose, you can consider various options to close off your space:
- Furniture: Large pieces such as bookcases, wardrobes, or room dividers can be semi-permanent walls.
- Curtains or Drapes: A flowing curtain or drape can create a pleasing aesthetic while offering the flexibility of opening and closing the space as needed.
- Folding Screens or Decorative Panels: Portable and versatile, these can provide privacy and a dynamic visual element.
- Plants: Larger indoor plants or a series of smaller plants can create a natural partition.
- Area Rugs: Although they don’t create a physical barrier, area rugs can define spaces and give the impression of separate zones.
Implement Your Chosen Solution
Here’s how to implement your chosen solution:
- Furniture: Carefully measure your space before purchasing furniture. Once you have your piece, place it where you want to define the space.
- Curtains or Drapes: Install the curtain rods or tracks above the area you want to separate, then hang your curtains.
- Folding Screens or Decorative Panels: Place your screen or panel within your space to create your desired division.
- Plants: Arrange your greenery in a way that naturally breaks up your room.
- Area Rugs: Unfurl an area rug in the space you’d like to define, then arrange furniture around or on the rug.
Bring Your New Space Together
Finally, ensure your created space feels coherent. Blend your chosen solution into the room by complementing the existing style and decor—from color schemes to texture and accessories.
Tips:
- Measure twice, buy once.
- Remember that your solution should suit your lifestyle. For example, ensure the division is secure and safe if you have pets.
- Don’t be afraid to try different arrangements until you find the perfect fit.
Frequently Asked Questions (FAQs)
How do you make a simple temporary wall?
Answer: To make a simple temporary wall, start by measuring the height and width of the space to calculate the amount of material needed. Construct the frame using wooden studs, then apply a cover (like plywood or drywall). Finally, install the constructed wall in your desired area and ensure it’s secure and level. Remember to avoid nailing or gluing the wall to the floor or ceiling to prevent damage.
Which is the cheapest option for a partition wall?
Answer: The most budget-friendly options for a partition wall include curtains or drapes, folding screens, and bookcases. Other affordable choices might involve using recycled wooden pallets or large indoor plants. Each option has its unique aesthetic appeal and level of privacy.
Is it hard to put up a temporary wall?
Answer: While putting up a temporary wall requires effort, it’s not excessively difficult if you have basic DIY skills and the right tools. Careful planning, precise measurements, and patience are key. Consider hiring a professional for more complex designs or if you’re uncomfortable.
How much weight can an apartment wall hold?
Answer: An apartment wall’s weight depends on the wall type. For a typical drywall, it’s safe to hang items that are approximately 10-15 pounds per screw or nail. For heavier items or loads, securing them directly into studs is necessary. As walls can vary greatly, it’s always best to consult a professional if unsure.
Conclusion:
In summary, constructing a temporary wall in an apartment can be a practical and efficient solution to create a new, functional space.
This DIY project involves careful planning and acquiring necessary materials, such as wall panels and 2x4s, and can be completed with some basic construction techniques.
By opting for noninvasive methods and adhering to local building codes, you can safely create your temporary wall without causing any damage to the existing structure.
A well-built temporary wall will not only provide privacy but also enhance your apartment’s overall functionality and appeal.


